In this article, we give you a step by step guide to enable Stripe payment gateway on your WooCommerce store for Indian customers.
Introduction
Stripe payment gateway is one of the most popular and the secured payment gateway options for payment for all eCommerce vendors. Stripe had launched its beta version in India in December 2017. Now after almost two years Indians have received the opportunity to use a fully functional Stripe online payment platform.

It is indeed a great opportunity for Indian eCommerce users when it comes to offering secured payment gateways on their online store.
Why Stripe?
Having a flexible API, and lower transaction fees, Stripe is a popular payment gateway worldwide. It is one of the fastest online payment processing platforms that is used widely. Here are some of the popular features that make Stripe payment gateway popular :
- No hidden charges like monthly charges, extra charges, etc.
- Supports payment from multiple countries (almost 40+).
- Accept major credit and debit cards across every country
- Support 135+ currencies.
- PCI DSS compliance
- Strict Customer authentication implied
- Faster fraud detection.
- Faster checkout using GooglePay, Apple Pay, and also Payment request API support.
- Easy to update as well as input payment information using Stripe elements.
- Quick capture of payments and refunds.
Add Stripe Payment Gateway to WooCommerce – Step by Step Guide
Now let us take a look at how Indian WooCommerce store owners can easily integrate Stripe payment gateway to their stores.
Step 1: Install Stripe WooCommerce payment gateway.
To use Stripe on your WooCommerce store, you can install the Stripe payment gateway from WooCommerce >> Plugins. You can also download it from WordPress.org.

Step 2: Create your Stripe account.
Firstly, you need to obtain a Stripe account. You can go here to enter your details and create the account.

Once registered, you need to validate your email ID provided from your email.

When the verification process is completed you will be directed to the Stripe Dashboard to obtain the live and test API keys for your store. You can also find the right integration for your business, as Stripe provides varied options for businesses. Then you can also get the test API keys by clicking on Get your test API keys.
Activate Stripe Account
Next, you go to the Activate Stripe account and click on Start now.

You get the following page to activate the Stripe Account. Here, you need to provide your country details, your product and business details, addresses, the account details, credit card details, and bank account details. You can also opt for a two-step verification for your Stripe account.

Upon submitting the details, you can then verify your account using SMS or using an authenticator app. If you are using SMS, then you receive a code sent by Stripe, which should be entered here :

Stripe then verifies your account and then your account becomes functional. Once the verification is done you can obtain the Test keys and live keys for the plugin.
Obtaining Live and Test API keys
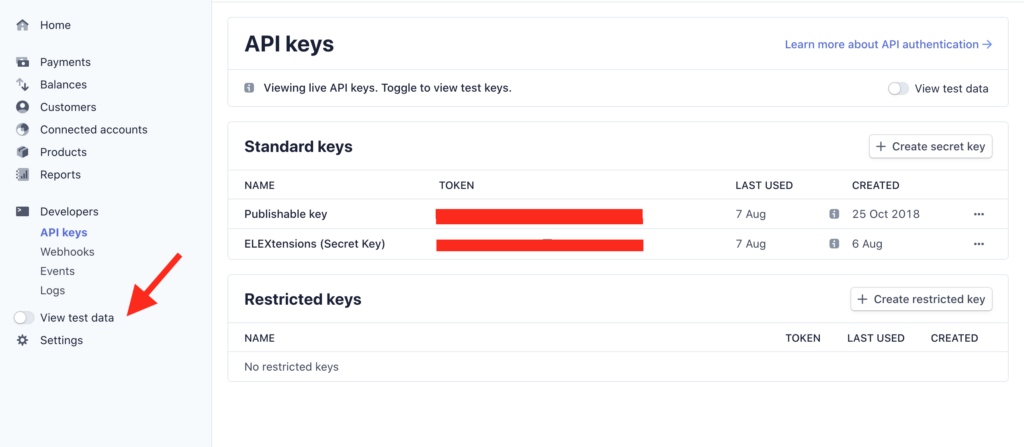
To toggle between the Test and live mode you can use the same :

Test keys are mostly used for testing purposes and the Live API keys are used for real transactions. To obtain the Test key, you can go to the Developers section in Stripe and in Developers>> API keys. You get the following screen.

Once you obtain the Publishable key and the secret key, you can use it in your store.
Also, you need to collect the Webhooks for your Stripe payment plugin. You can obtain the same in Stripe>>Developers>>Webhooks
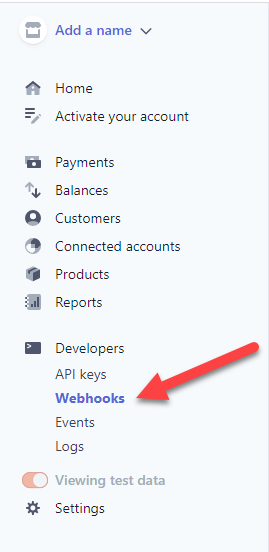
Webhooks are used by Stripe to notify any events happening in your account. For example, when a customer’s bank confirms payment or if any recurring payment succeeds, etc. To do the same, follow these steps:
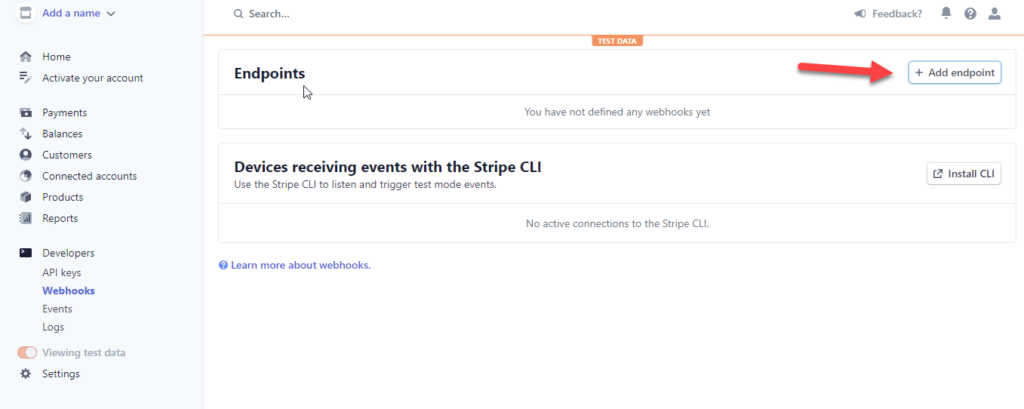
- Create a Webhook endpoint.
 On clicking on Add endpoint, you get another screen, wherein you need to enter the URL of the website and then create the endpoint.

- Use Stripe CLI, for triggering and listening to the events chosen in the endpoint.
- Then register the endpoint.
 On clicking on Add endpoint, you get another screen, wherein you need to enter the URL of the website and then create the endpoint.
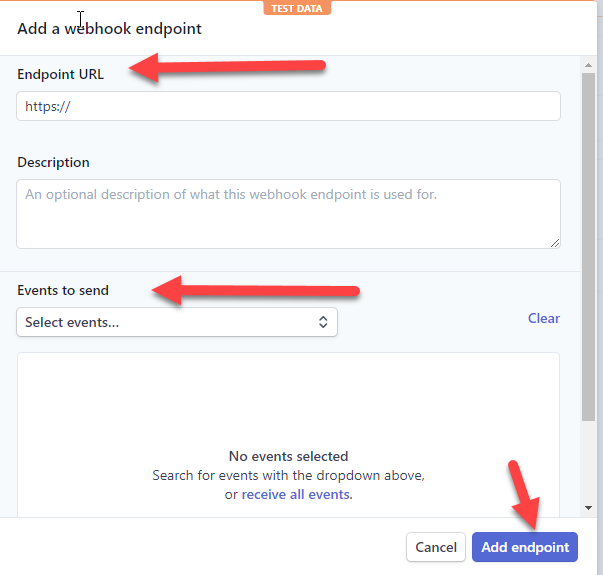
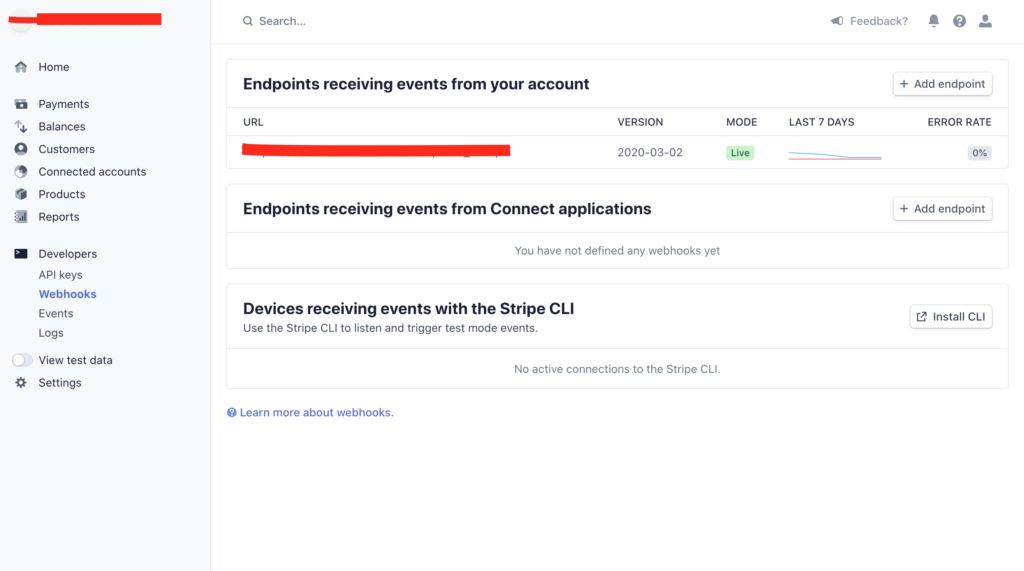
Once done you can see the webhook key in the signing secret, which you can copy and paste in the Webhook key secret in the plugin.
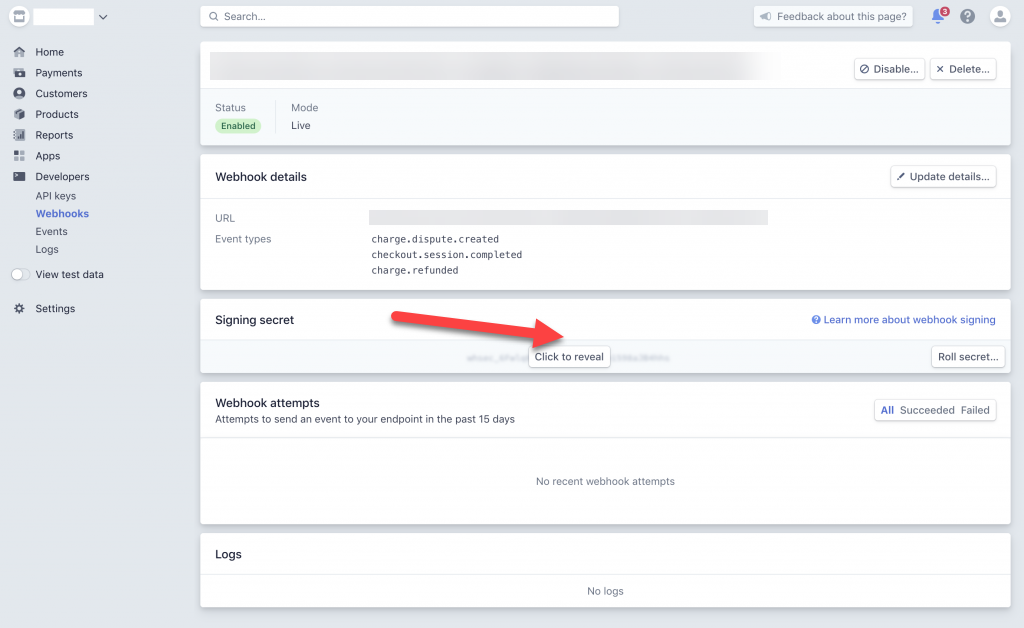
Webhooks are not important for all the Stripe integration, but it helps to notify any major things happening with your account.
Read more about Webhooks to know more about it here.
Step 3: Plugin Configuration
To configure the plugin, you need to activate the same in WooCommerce payments.
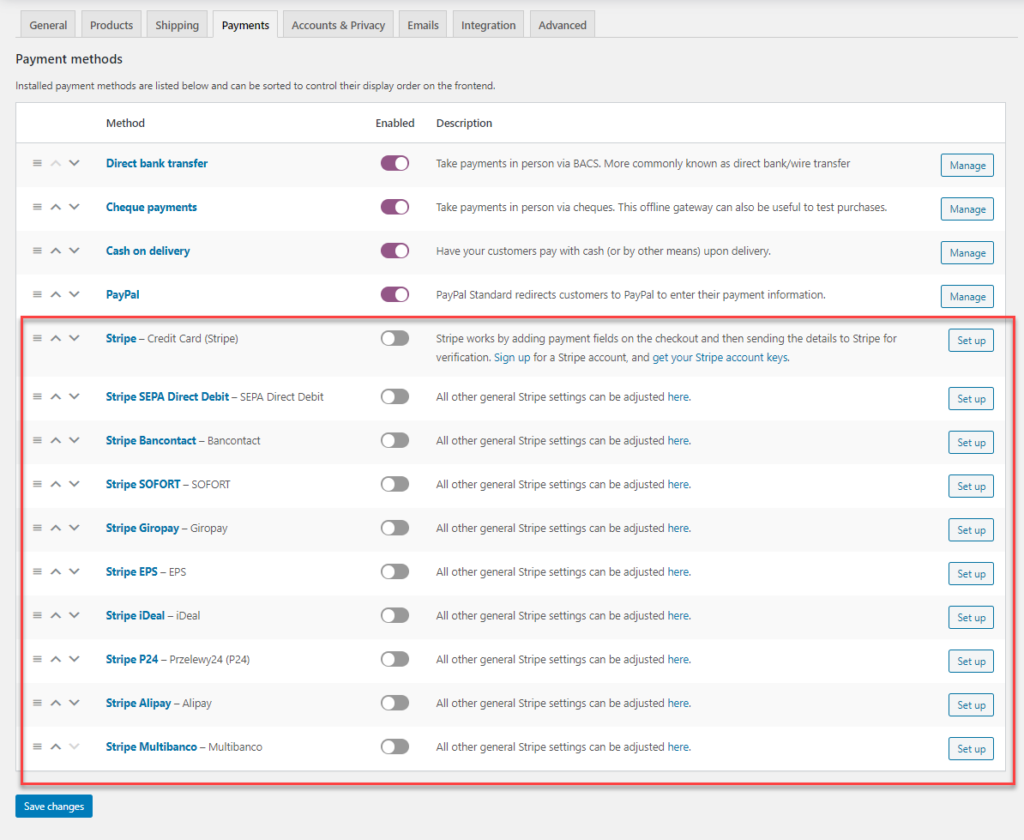
On clicking on the Manage option, you get to see the Stripe settings to be configured.

Here you can enable the Stripe payment gateway, enter the Publishable key, and the Secret key obtained from Stripe to activate the Test or live mode. Also, you can enable the capture option to capture the payments and also the Payment request buttons which lets you enable Payment requests buttons.
If you are switching to the Live mode, then you need to obtain the API keys for the live mode. This can be fetched from your Stripe account.
Once you obtain the live credentials, you can enter the same in the plugin to use. To do so, you need to disable the test mode and provide the Publishable key, secret key, and the webhook secret.

Once done Save the Settings.
Step 4: Checkout Page Stripe Details
Once all done, you can see the Stripe payment gateway option display on the cart and the checkout page.
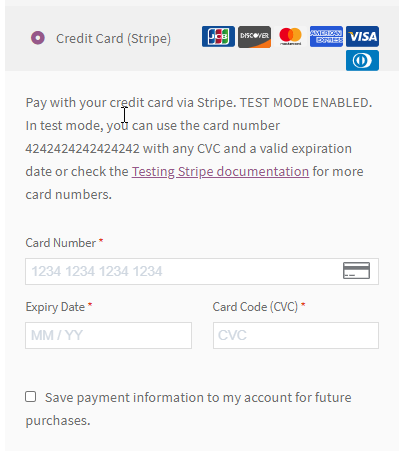
When the live API keys are provided the checkout page will show like this :

Here you can provide the card details and then proceed to checkout.
Take a look at the video for a better idea:
To Wrap up
This is how Indian WooCommerce store owners can easily integrate Stripe Payment gateway on their WooCommerce store easily and provide a secure and fast payment option for their customers worldwide.
Apart from Stripe, you can also make use of other payment gateway options like Amazon Pay, Authorize.net, Apple Pay, etc. , which also offer secured and fast online transactions for businesses.
Read More :
How to Add Stripe Payment Gateway to WooCommerce – Step by Step Guide

