When it comes to choosing the right payment plugin for your WooCommerce store, Stripe is something that comes to mind first. With a flexible API, Stripe is quite popular and also provides lower transaction fees. Here in this article, we take you through simple steps to add Stripe payment gateway to your WooCommerce store.
What is Stripe?

Stripe is the fastest online payment processing platform. It offers a secured and easy to process payment platform that lets your customers stay on the checkout page, rather than being redirected to another page for making the payment. This in turn leads to higher conversion rates. There are no hidden fees, no monthly charges, or extra charges, which makes Stipe popular among eCommerce businesses. Stripe offers its services in more than 40+ countries. You can also accept major credit and debit cards across every country and support 135+ currencies. Stripe also accepts local payment methods like iDeal, Alipay etc.
Why Stripe?
Here are the reasons why Stripe is ideal for your eCommerce store :
- Accepts all credit and debit card payments as well as local payment methods.
- PCI DSS compliance achieved.
- Stronger customer authentication.
- Detects fraud using Stripe Radar.
- Faster checkout using GooglePay, Apple Pay, and even Payment request API support.
- Allows recurring payments via WooCommerce subscriptions.
- Easy updates and the addition of innovative functionalities.
- Easy input of payment information using Stripe Elements.
- Quick capture of payments and refund offered quickly without much hassle.
Add Stripe Payment Gateway to WooCommerce -Step by Step Guide
Now let us take a look at how you can add Stripe to your WooCommerce store.
Step 1: Firstly you need to create your Stripe account.
In order to obtain a Stripe account, you can go here. Enter your details and click on create the account.

Once done, you get the Stripe dashboard. Here you can validate your email address and then obtain the test and live API keys for your use.

Once the verification is done, you are redirected to the dashboard.
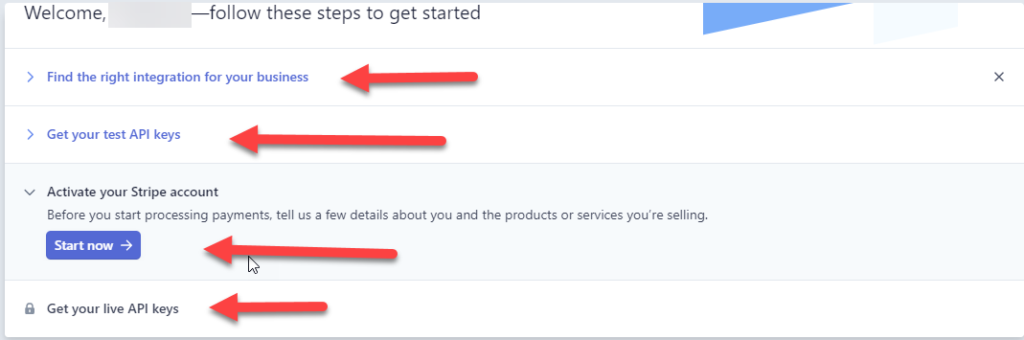
You can opt to find the right kind of integration for your business. And also obtain your Test API keys. When you click to activate your Stripe account, you are redirected to a page, wherein you need to fill in details regarding your business, your address details, etc.
In order to obtain the Test key, you can go to the Developers in Stripe and in Developers>> API keys. You get the following screen.

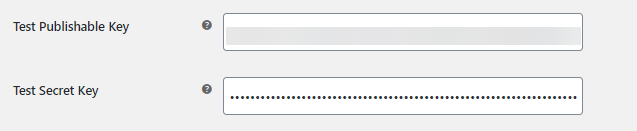
The Test API keys can be obtained from here and used in the plugin. You can enter these keys in the fields Test Publishable key and Test Secret Key as shown in the following screen.
When you want to obtain the live credentials, you need to validate your Stripe account and then you can toggle between the test and live data for use on your store.

Step 2: Install Stripe WooCommerce payment gateway.
Now in order to use Stripe in your store, you need to install the plugin on your WooCommerce store. You can go to your WooCommerce store and install Stripe from Plugins>>Add New >>Stripe. You can download and then activate the plugin.

Or you can even go to WordPress.org and then download Stripe from there.
Step 3: Plugin Configuration
After activating the plugin you need to navigate to WooCommerce>>Settings>>Payments.
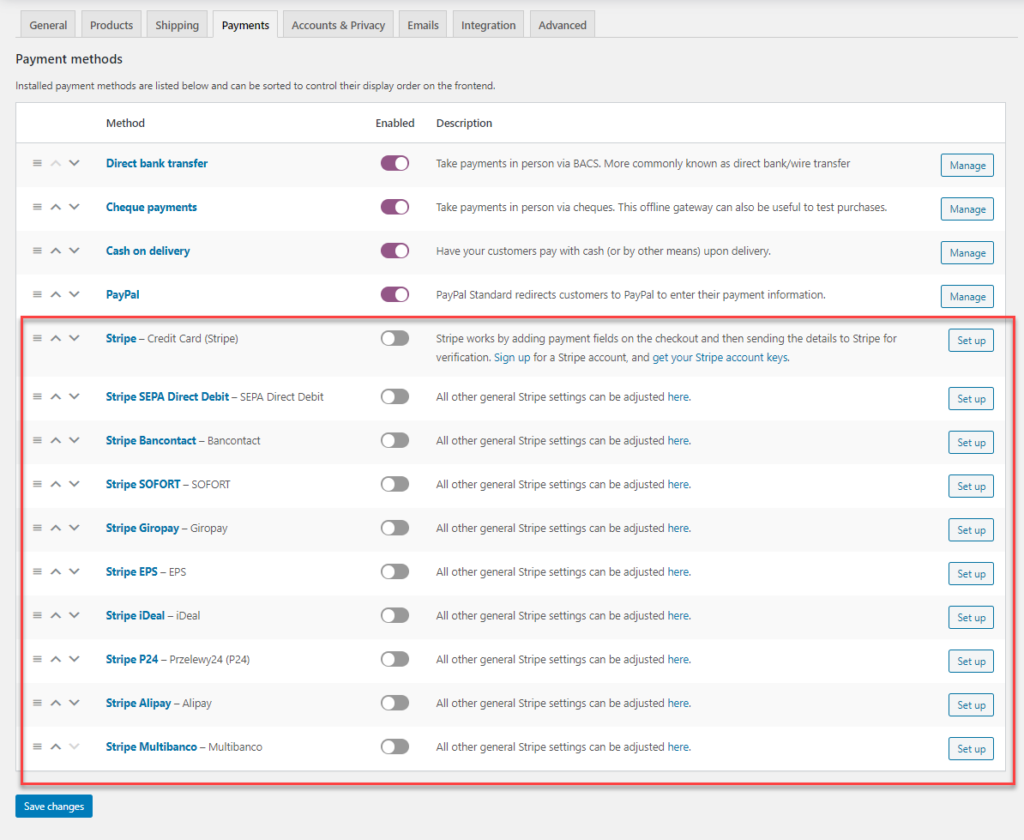
Here you can enable the required Stripe service for your WooCommerce store. Once the button is enabled for Stripe, you can click on Set up, you are then navigated to the following page.

You can select the Test API keys and paste them on the settings page and then save the same.
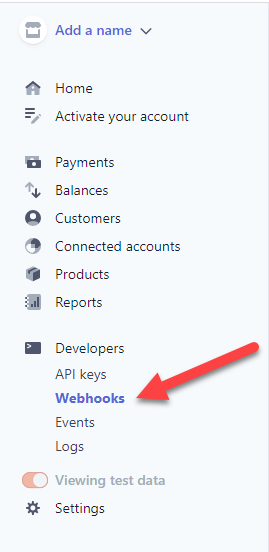
You can also obtain the Webhook keys from the Stripe account. To do the same you need to go to Stripe>>Developers>>Webhooks .
Here you need to perform the following to obtain the webhook:
- Create a Webhook endpoint for your account
- Use Stripe CLI, for testing the endpoint you created
- And then register the endpoint.
You can use the key then provided in the Webhook.
Read more about Webhooks to know more about it here.
Step 4: Checkout Page Stripe Details
Once all the settings are enabled, you get the Stripe checkout option on the WooCommerce checkout page.
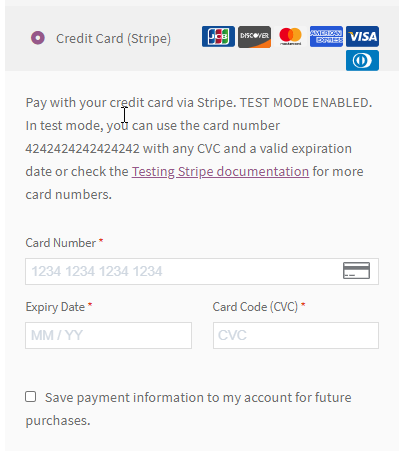
Here you can enter the card details and proceed to checkout.
Watch the video for better understanding.
To Wrap up,
This is how you can integrate Stripe to your WooCommerce store easily. WooCommerce offers several options to include different payment gateways easily to facilitate easy and secure checkout options for the customers.

