Are you wondering how to feature a WooCommerce shipping calculator on your website? You might offer the ultimate buying experience, with attractively priced products and top-notch customer care. But ultimately, it’s the cost of delivery that persuades customers to buy from your eCommerce store. How buyers perceive your brand is significantly influenced by the smoothness and transparency of your shipping strategy. Everything from the timeliness with which they receive a product to the cost of shipping comes together to offer buyers with high-quality shipping experience. Setting and displaying shipping prices is an issue that almost every owner of an eCommerce store faces. Although it’s not the easiest task, with the correct tool, it gets a lot simpler. In this article, we’ll show you how to include a WooCommerce shipping calculator on your website – on the product page, checkout page, or any other page.
If you offer a wide range of products of a similar nature, WooCommerce provides shipping tools that can meet your basic requirements. WooCommerce’s fundamental functionalities, however, are restricted when it comes to complicated shipping calculations. You must enable WooCommerce’s premium capabilities in order to sell different types of products. You can add a shipping calculator that serves a variety of purposes with it. A shipping calculator aids website owners in defining different delivery charges while taking into account diverse scenarios. For example, you can compute shipping charges depending on weights, products, locations, and so on.
How do you figure out shipping prices for your WooCommerce store?
Before we go into how to add a shipping calculator to WooCommerce, you should know how to compute shipping rates on your eCommerce site. Configuring the shipping calculator tool will be challenging without this.
Important elements influencing shipping costs: Weight of the parcel, dimensions of the parcel, the price of the items being shipped, the volume of the delivery, and product delivery timelines.
How to use the ELEX WooCommerce Shipping Calculator, Purchase Shipping Label & Tracking for Customers plugin to create a shipping calculator for WooCommerce?
Using the ELEX WooCommerce Shipping Calculator plugin, you can quickly create a WooCommerce shipping calculator. Using this plugin, you can specify different shipping rates based on factors like location, cost, weight, shipping class, or the number of goods. Major shipping courier services can be compared in a couple of clicks, and then you can select the most appropriate service and place an order for the product. With the help of this plugin, shipping labels can be printed, ordered items can be tracked, and information can be sent to the customer and store administrator. Additionally, it enables customers to estimate shipping costs before adding things to their carts. By simply entering their address and postal code into a shipping calculator located on your website, they may determine the cost of shipping.
You can read this comprehensive guide to find out everything there is to know about this shipping calculator and how to use all the features and set it up from scratch: How to set up ELEX WooCommerce Shipping Calculator, Purchase Shipping Label & Tracking for Customers? Once the plugin has been installed properly, you can use the new website’s shipping calculator.
Step 1: Adding EasyPost Credentials
Your EasyPost API-Key must be entered here, and the API Mode must be set to Live or Test. Through EasyPost, the plugin currently functions with FedEx, UPS, USPS, and Canada Post.
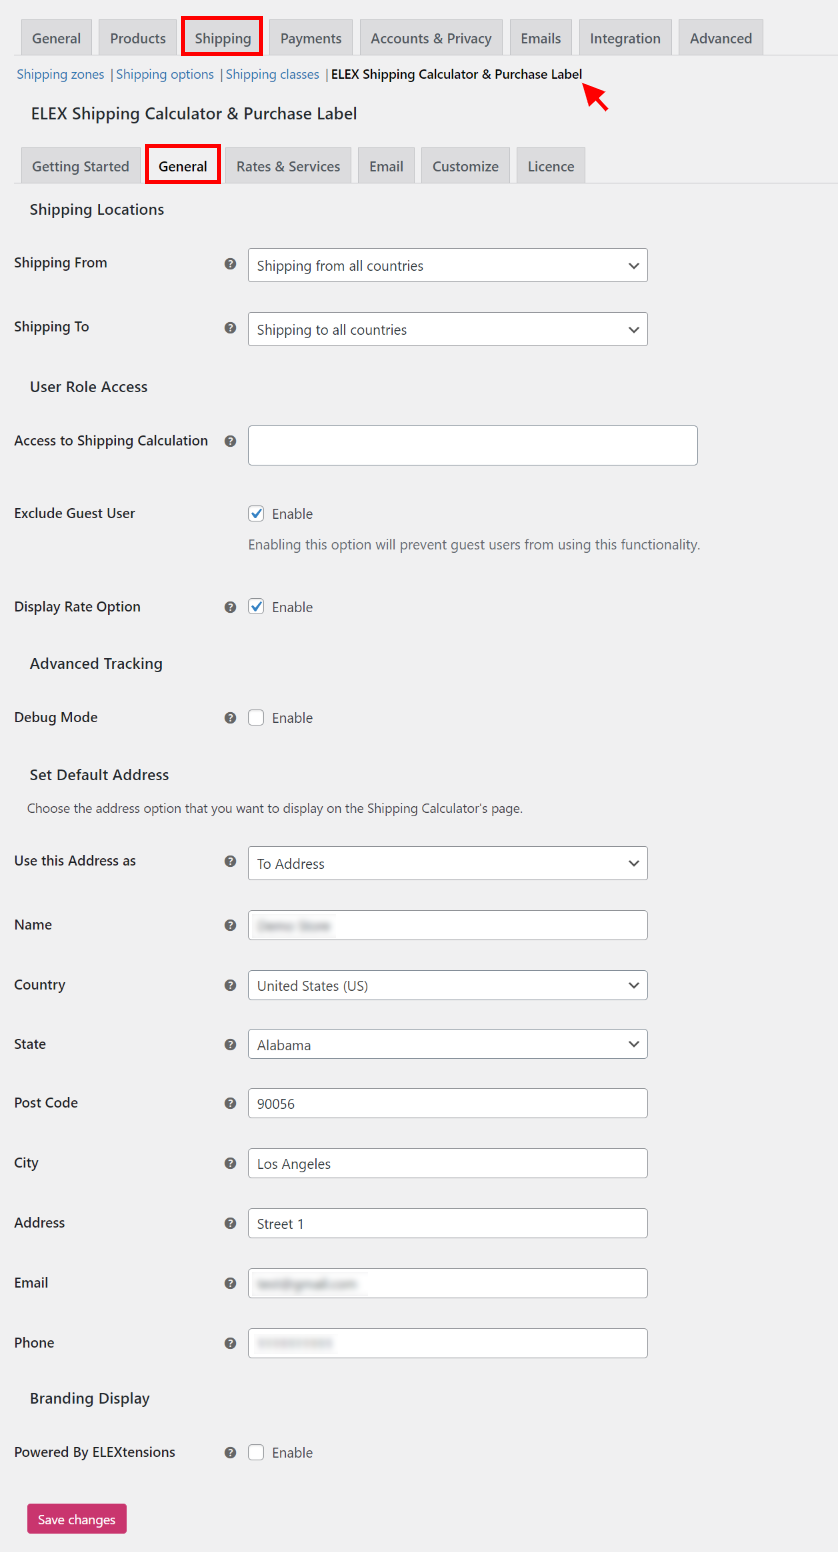
Step 2: General Settings
In this tab, enter the shipping from and to locations, set the user role access as per your requirements, choose if you want to enable guest users to access the shipping calculator, and choose if you want to enable the option to switch between retail and commercial rates, enable debug mode, and set default from or to address if needed.
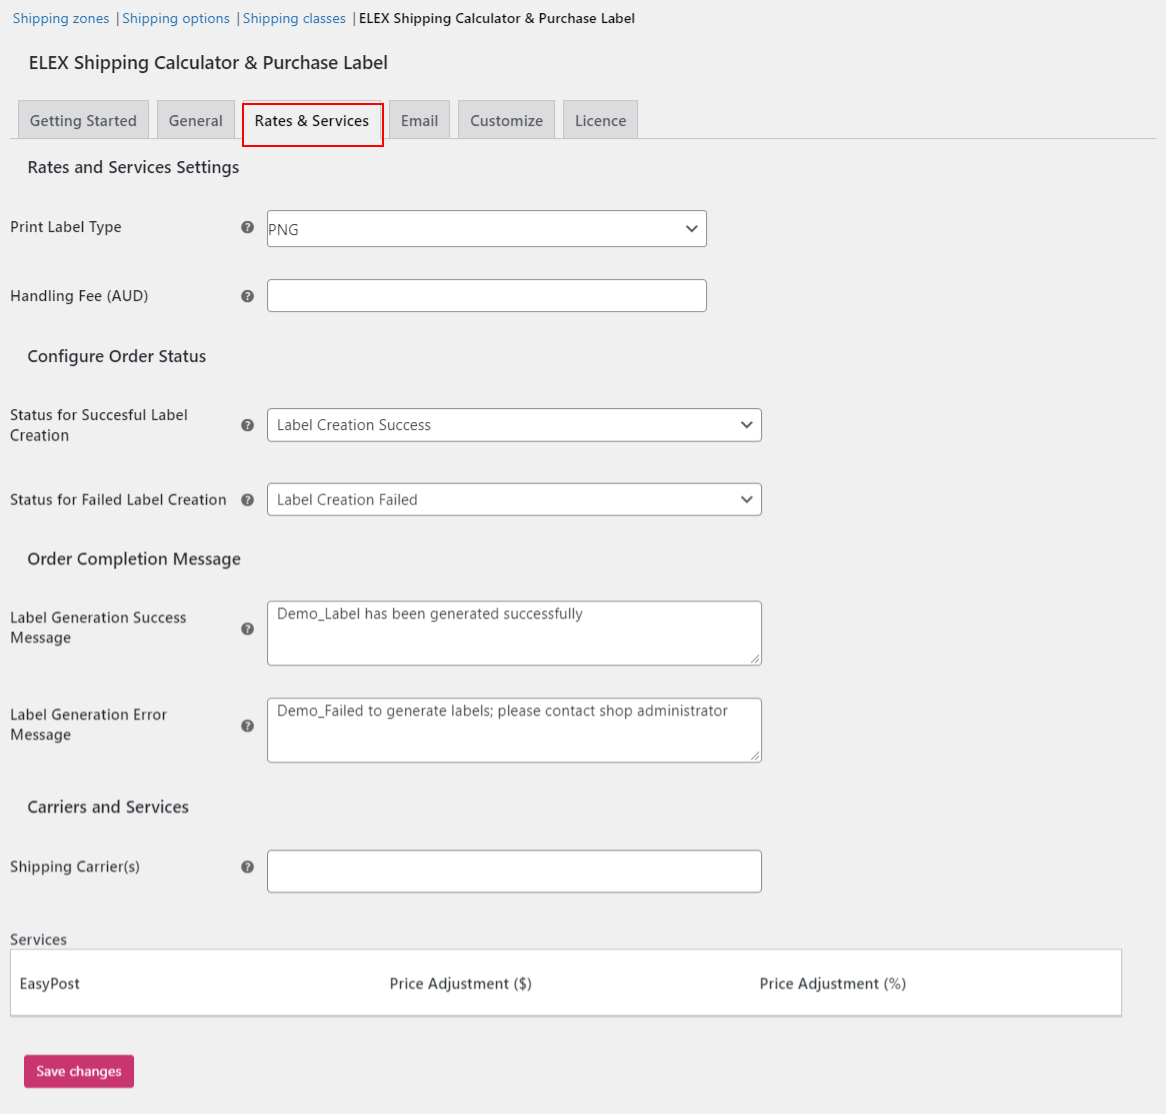
 Step 3: Rates and Services
The handling fee, shipment carrier information, and the label that will be printed are all configured on this tab.
 Step 4: Email Settings
When a label is generated in the Shipping Calculator, you can use the configured settings under this tab to automatically send a custom email with the shipping label and tracking link to the given shipping and billing email addresses. You can create personalized email content in both text and visual formats. You can add the shortcodes for the shipping label and tracking URLs to the draught email and specify where they should appear in the text body.
 Step 5: Customize

Under this tab, you can add a header text, a suitable description, the checkout button text, documentation, or a help page, and play around with the color template of the shipping calculator to make it match the design aspects of your website.
 Now that the basics of configuring the shipping calculator are covered, let’s get to featuring the shipping calculator on the product page, checkout page, or any other newly created pages of your WooCommerce website.
If you want to create a new dedicated page for the shipping calculator, simply create a new page on WordPress by navigating to the WordPress dashboard > Pages > Add New. Create a title, such as Shipping Calculator. Next, we need to add the shipping calculator shortcode – [multilabel] to the page. To add a shortcode, click the plus sign (+) and type “shortcode” into the search bar.
 After clicking it, type [multilabel] into the shortcode box.
 Click Update and the shipping calculator will be added to the newly created page.
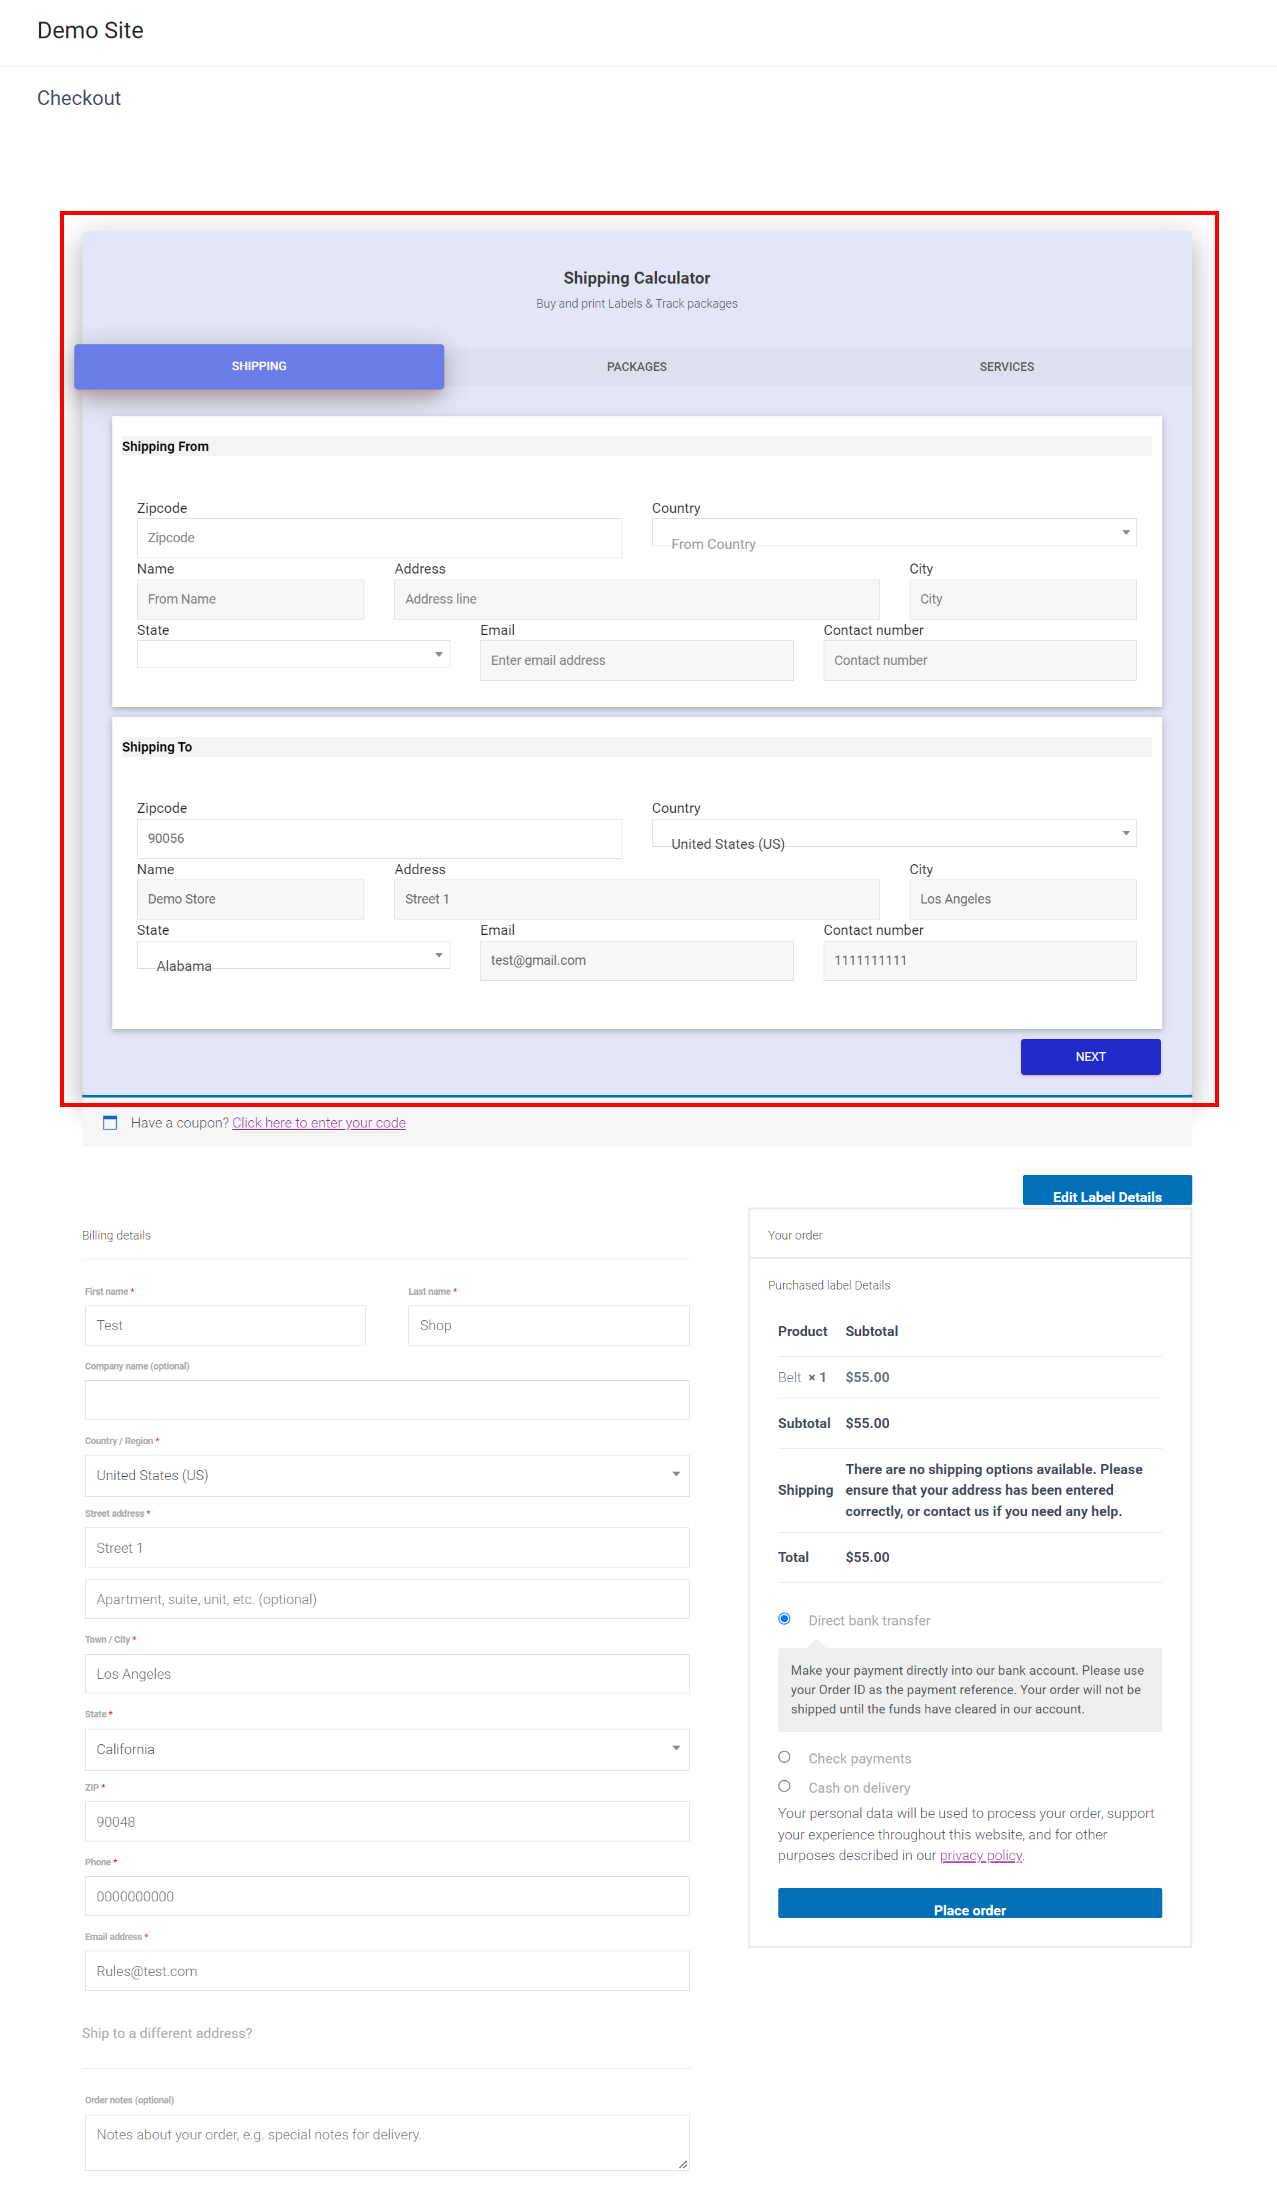
 This process can be carried out on whichever page you want to display the shipping calculator. We shall demonstrate on the checkout page:
We will simply add the shortcode on the checkout page and click Update.
 As you can see, the shipping calculator is now added to the checkout page of the website.
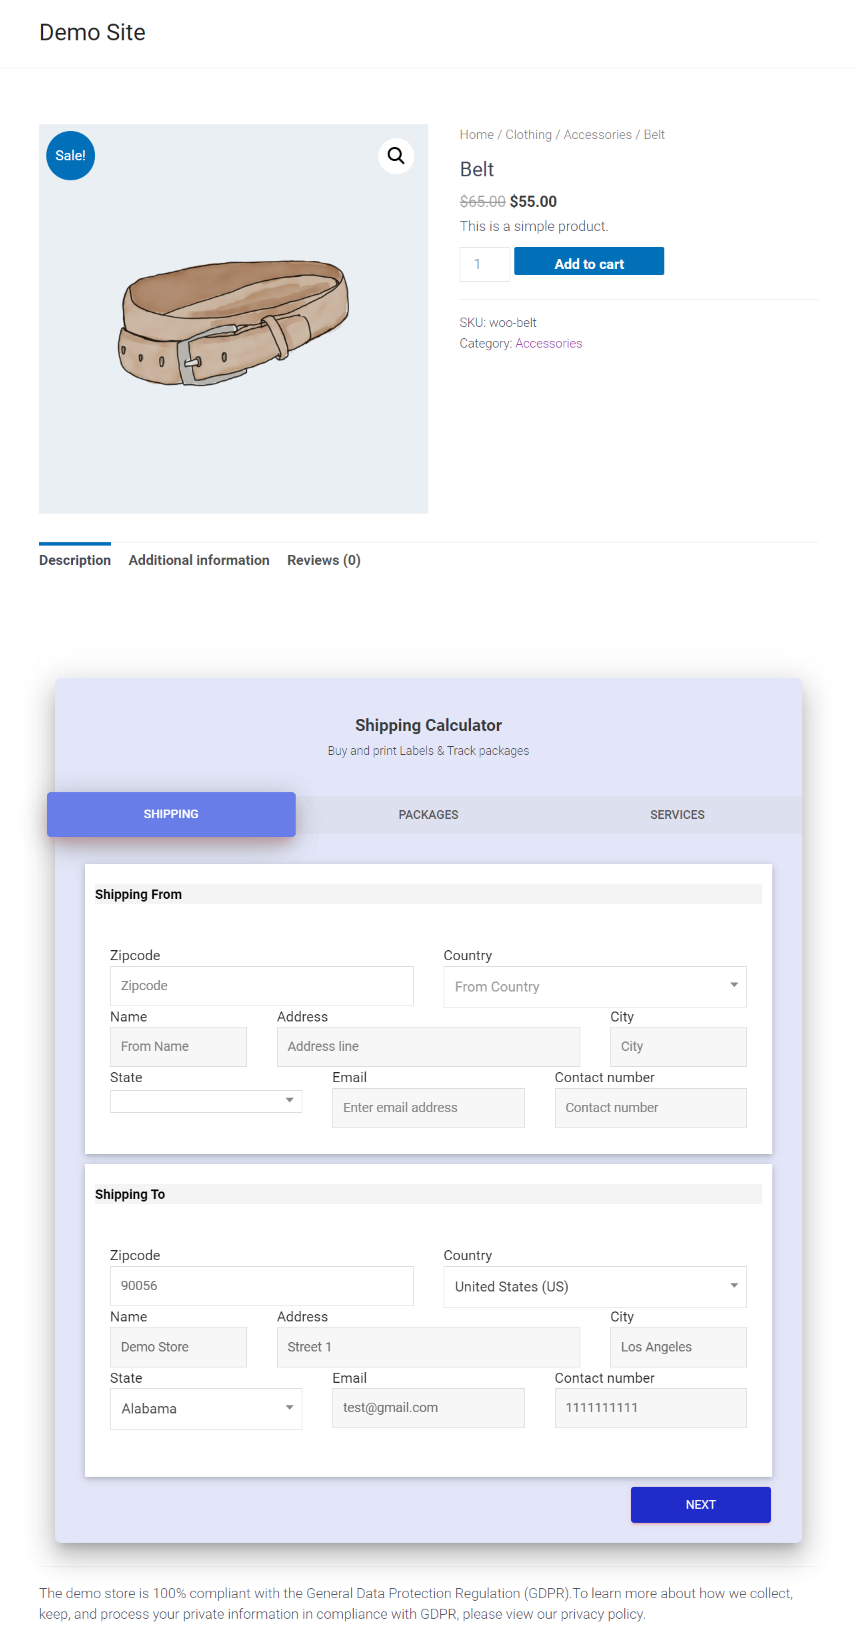
 Similarly, it can also be added to individual product pages, let’s take a look.
Simply edit the product page that you would like to add the shipping calculator to and add the shortcode into the text box as shown below.
 As you can see, the shipping calculator will be added to the individual product page.
 Wrapping Up
Shipping is an essential component of any WooCommerce store, just like advertising, branding, product development, etc. It might occasionally end up being what sets your online store apart. Because of this, you should take a great effort to establish open and upfront shipping costs for your products. WooCommerce’s core may not be up to the task of generating intricate shipping regulations, but if you know how to use the plugins correctly, you shouldn’t have any problems.
We hope this article has helped you add a dedicated shipping calculator on your website according to your requirements in just a few simple steps. If you have any queries regarding adding a shipping calculator to your website, please let us know in the comments section below.

