Offering the ability to negotiate on your online store is essentially a quick way to impress your customers. Have you ever thought of enabling the option to let customers place a quote request on your products or services? Here in this article, we look at the easy steps to enable Request a Quote for WooCommerce customers.
What is Request a Quote?
B2B platforms need to be flexible while selling. They need to provide customers with the opportunity to negotiate or the freedom to request a quote. Using this simple pre-sale functionality, you can allow customers to send the quote request to the store owner with ease. You can capture genuine leads by opening up a room for negotiation. This is ideal for buyers who are interested in buying in bulk from you. Also, you can reap the benefits of multiplying sales with increased conversions
Easy Steps to Enable Request a Quote for WooCommerce Customers using the ELEX WooCommerce Request a Quote Plugin (Free)
Here to enable the Request a Quote option on your WooCommerce store, you can make use of the free plugin ELEX WooCommerce Request a Quote Plugin.
Here are some features of the plugin which makes it handy for any WooCommerce store.
- Easily allows you to add a Request a Quote option for your WooCommerce products.
- It supports both simple and variable WooCommerce products.
- Easily hide the ‘Add to Cart’ button.
- Customize WooCommerce Request a Quote option as per your store preferences.
- Allows to trigger email notifications to the customers and to store admin.
- And it is FREE.
Let us now look at the steps to install the free plugin.
Step 1: Download and install the plugin
Download and install the plugin from the product page. You can read and understand all about installing the ELEX plugins on your WooCommerce store.
Once the plugin is activated, you can go to the Dashboard > Plugins > Installed Plugins > ELEX WooCommerce Request a Quote Plugin> Settings to view the settings.
Step 2: Configure General Settings
First, we need to set the general settings in the plugin. The settings will look like this as shown in the image below:
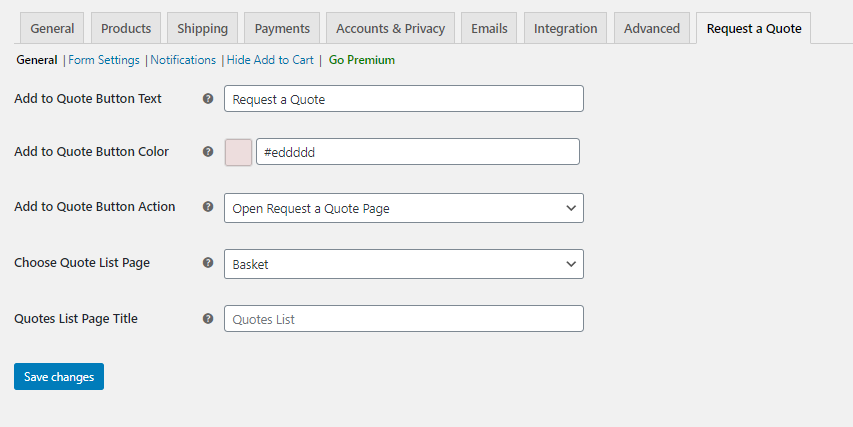
Here are the following settings to be done:
Add to Quote Button Text: Provide a placeholder text to be displayed on the button to place the quote for the products. By default, it is ‘Add to Quote’.
Add to Quote Button Color: Pick a colour for the ‘Add to Quote’ Button.
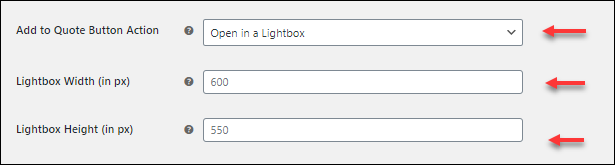
Add to Quote Button Action: Choose the action to perform when customers click the Add to Quote button. You will find two options in the drop-down, as shown in the image below:
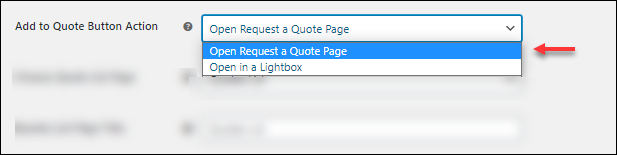
Open Request a Quote Page: Upon choosing this option from the drop-down, whenever the “Add to Quote” button is clicked, a hypertext “Browse the list” will appear as shown in the image below.
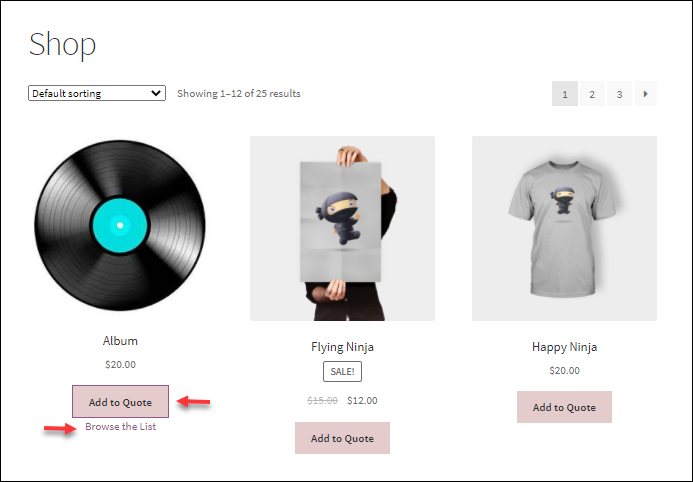
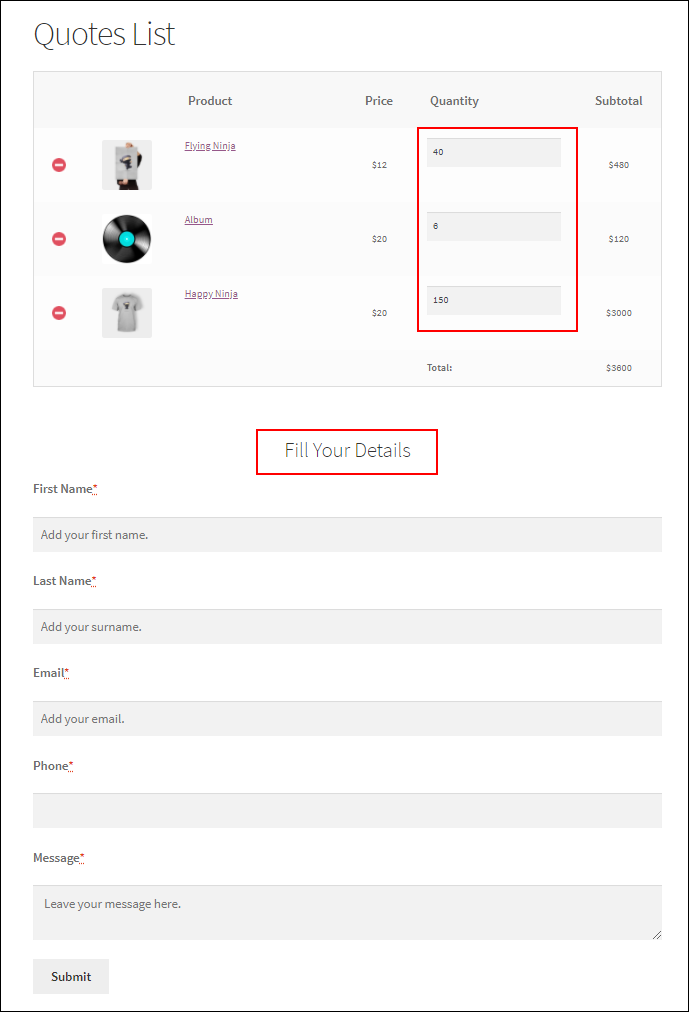
Upon clicking the Browse the List option, the Quote page will appear wherein the customers can add several products. Also, you need to specify a quantity they want and fill in their details to submit a quote.
Open in a Lightbox: If you choose this option, then the quote list will open up as a pop-up window for which you can specify the custom width and height accordingly as shown in the below image:
The pop-up window will look like this, as shown in the below screenshot:
 Similar to the other option, you can enter the quantity and fill in your details to send the quote.
Choose a Quote list Page: Using the settings, you can choose a default page in your store, to display the quote list. As per the default settings, it is the “Quote List” page as shown in the image below:
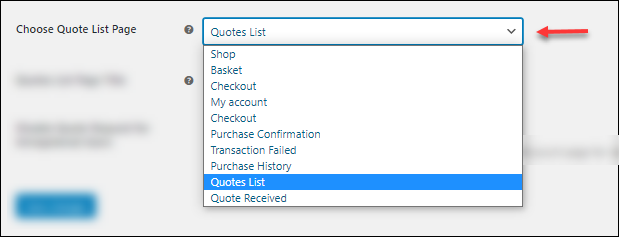
To create that page in your WooCommerce store, you can make use of the shortcode “[elex_quote_request_list]”.
- Quotes List Page Title: Here you can enter a custom page title. By default, it is the ‘Quotes List’.
Once done, save the changes.
Step 3: Set up the Form for Requesting Quotes
To let your customers place a quote request on your store, you need to set up a request form on your store. To do the same, we can make use of the Form Settings in the plugin as shown in the image below:
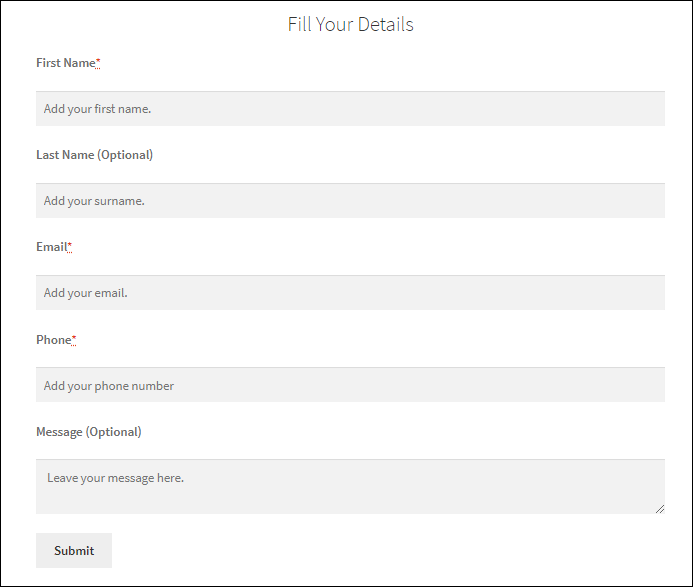
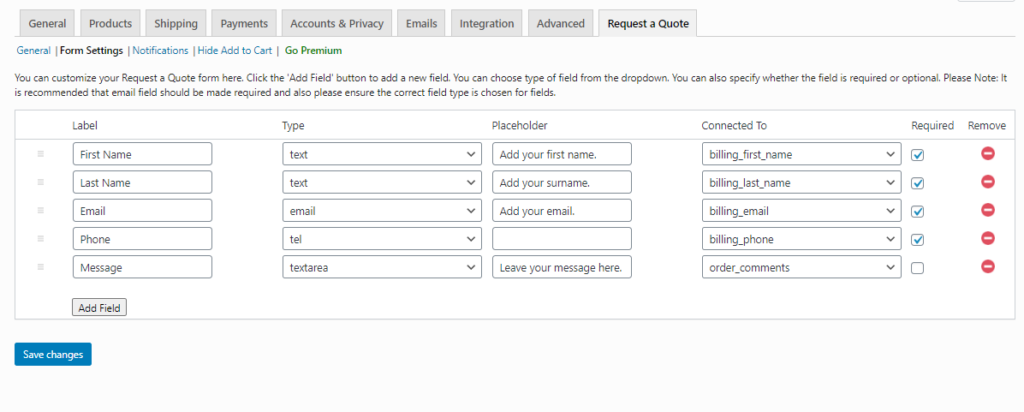 Choose the required field as per your need and save them. If you need to add more fields, you can also add the required fields or even remove them if not required. Once the settings as shown in the image above are saved, the form will look like this as shown in the image below:
Step 4: Enable Notifications
Keeping the customers and the store admin notified is always better. Using the plugin, you can readily set up email notifications for your store admin. You can also set the notification for the customer regarding the order updates via email. The settings are as shown below:
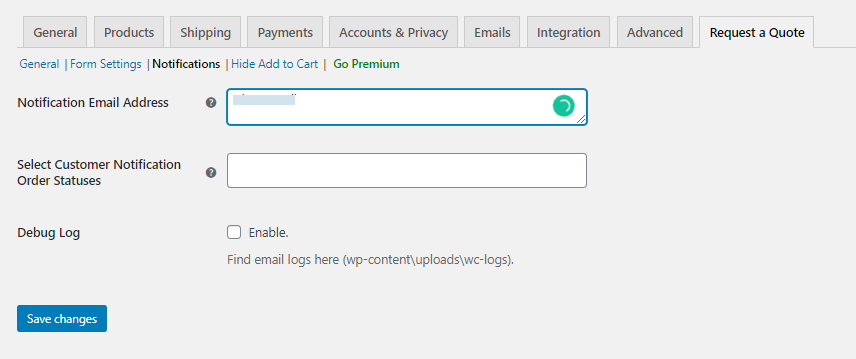
By default, the email address provided is that of the admin.
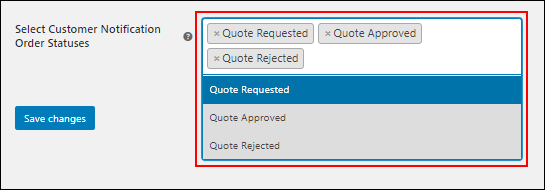
Also, you can enable the notifications for the customer based on the Quote Statuses as shown in the settings image below:
Debug Log: You can enable this option to check the email notifications details such as the subject, address, and mail/message body that are triggered. You can find the details can be found by navigating to WooCommerce > Status > Logs.
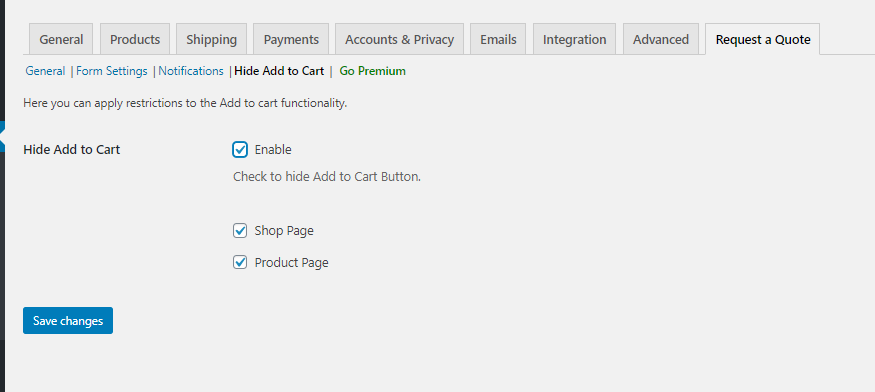
Step 5: Hide Add to Cart
Using these settings, you can hide the ‘Add to Cart button’ for the products on the Shop page and the product pages when the ‘Request a Quote’ option is available on your WooCommerce store.
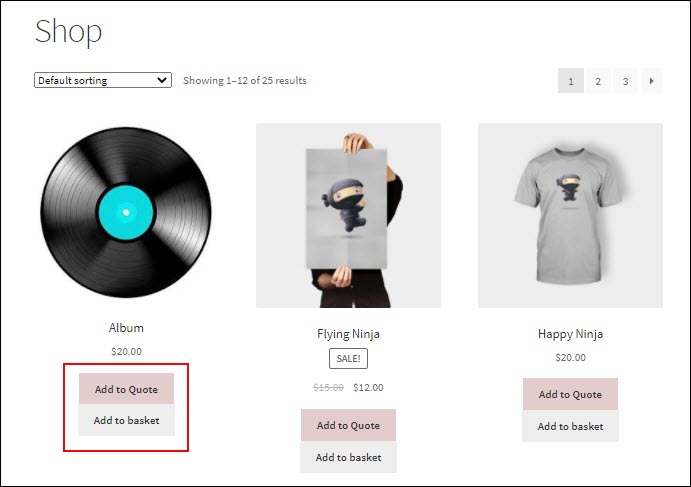
If you are not enabling the Hide Add to Cart button, then the ‘Add to Cart’ button is displayed along with the Request a Quote button as shown in the image below:
To Conclude,
Using these 5 easy steps, you can enable Request a Quote for your WooCommerce customers. You can also check for the premium version of the plugin to explore more features.
Further Reading

