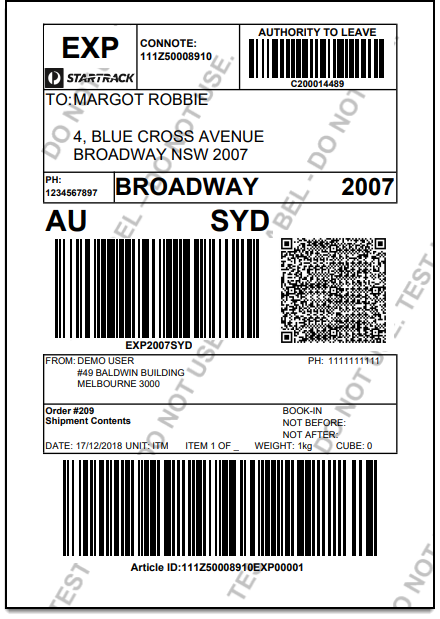
In this article, we will be going over the steps involved in printing WooCommerce Australia Post Shipping labels in bulk. We will be using the ELEX WooCommerce Australia Post Shipping Plugin with Print Label & Tracking for integrating Australia Post shipping options and services into WooCommerce.
Introduction:
Developing efficient shipping can be super tricky. Generating shipping labels and other documents is an integral part of the shipping process. When you’re a WooCommerce store, handling the creation, as well as printing, can become cumbersome. The ELEX WooCommerce Australia Post Bulk Label Printing Add-On generates shipping labels and merges it into a single PDF using the iLovePDF API. Using the add-on, however, you can save time and energy by printing shipping labels in bulk
Prerequisites:
- ELEX WooCommerce Australia Post Shipping Plugin with Print Label & Tracking allows you to access real-time rates shipping labels, track shipments and helps in packing items into boxes.
- ELEX WooCommerce Australia Post Bulk Label Printing Add-On: This Add-On works only with ELEX WooCommerce Australia Post Shipping Plugin with Print Label & Tracking. The add-on is able to print bulk shipping labels for all services offered by Australia Post like Startrack and eParcel.
- Project and Secret keys from an iLovePDF developer account. You can place up to 250 API calls a month for free. This is more than enough to generate shipping labels in bulk for any small to medium sized WooCommerce business.
Setting Up WooCommerce Australia Post Shipping Labels:
Step 1: Download, install and activate the plugin, first.
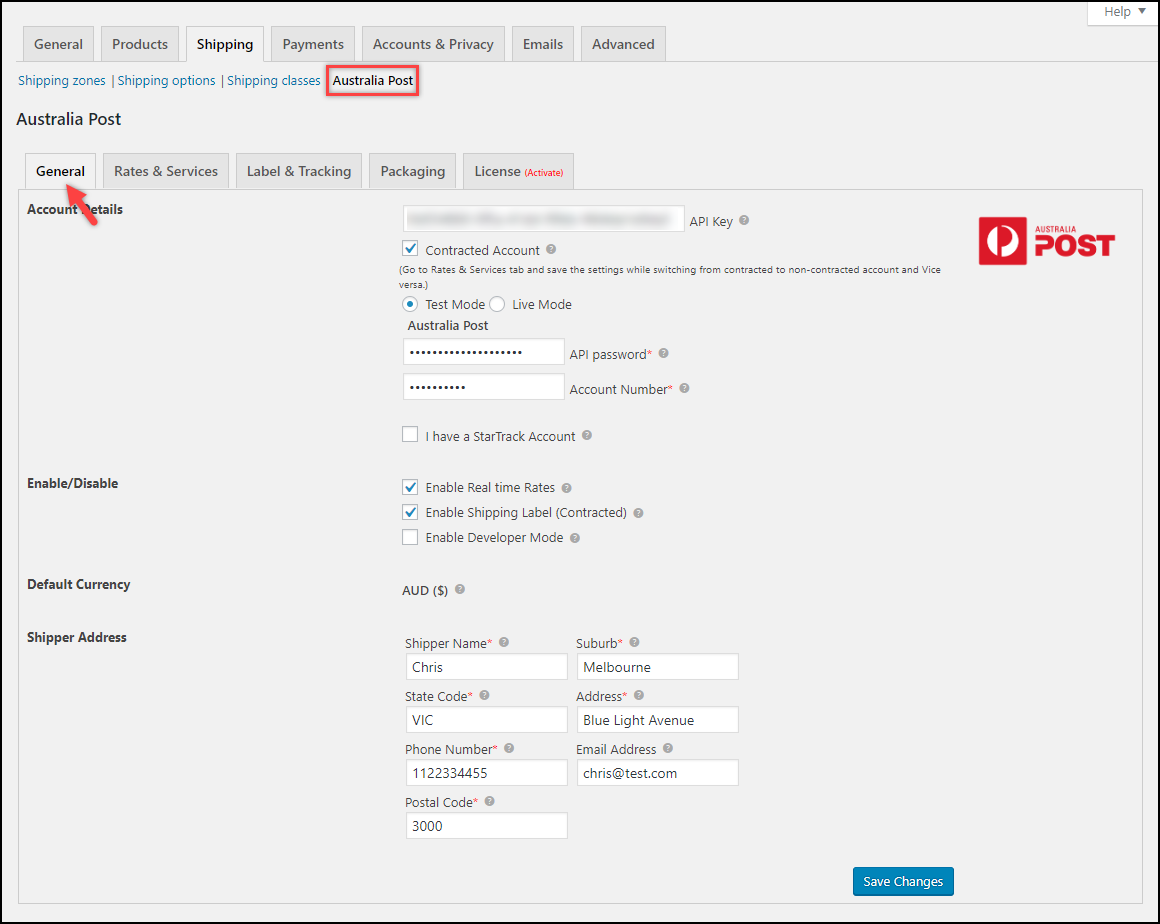
Step 2: The plugin settings can be found at Plugins > Installed Plugins > Australia Post Shipping plugin with Print Label. In the General Settings tab, paste the API Key, API Password and the Account Number. To get these details you will need to create an Australia Post account and request API access. You can also choose between standard or contracted rates by enabling/disabling the Contracted Account checkbox. Provide the Shipper Address and click on Save Changes.
Step 3: Choose all the DHL services you wish to enable or disable. Importantly, make sure the Shipping Label checkbox is ticked.
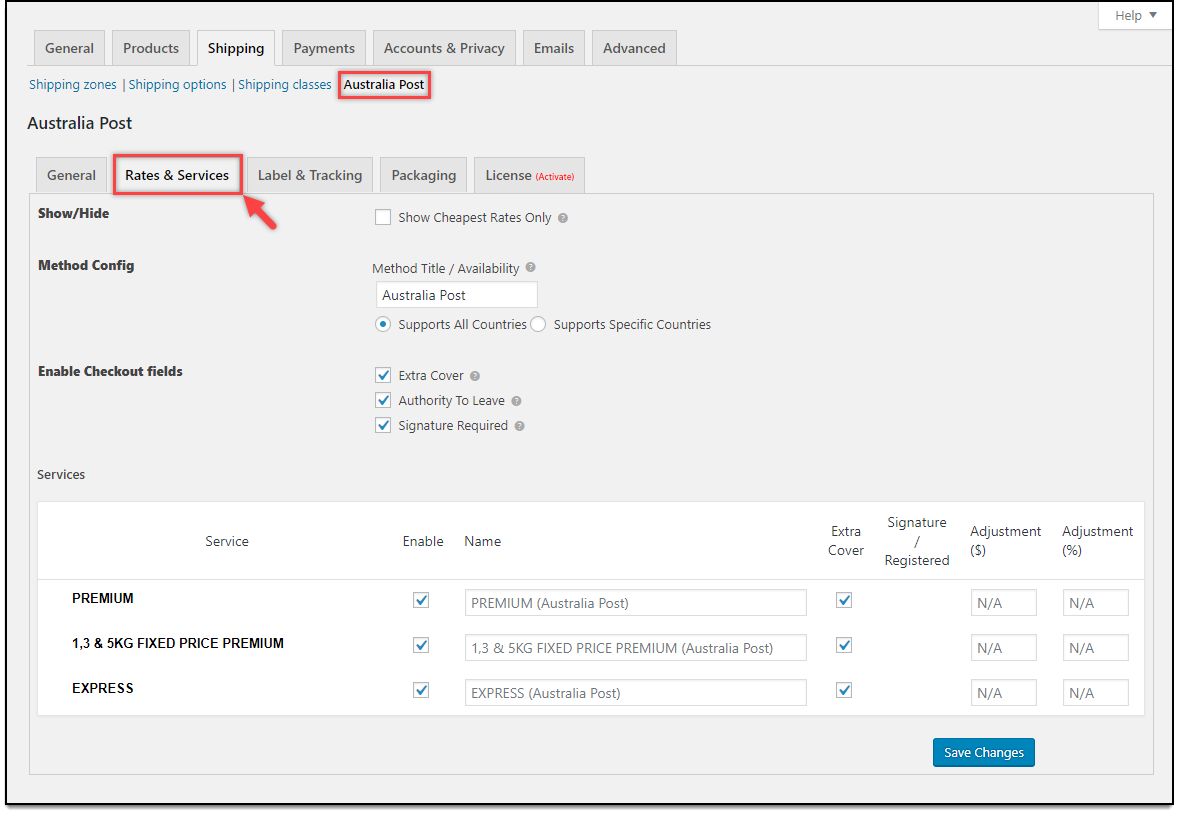
Step 4: In the Rates & Services tab you can choose all the WooCommerce Australia Post shipping options you want to enable. Moreover, you can also configure the rates using the Adjust Price field.
You can also choose to enable Shipping Insurance by enabling the Extra Cover checkbox. Additionally, this plugin features the ability to enable Authority To Leave and make signatures mandatory for delivery.
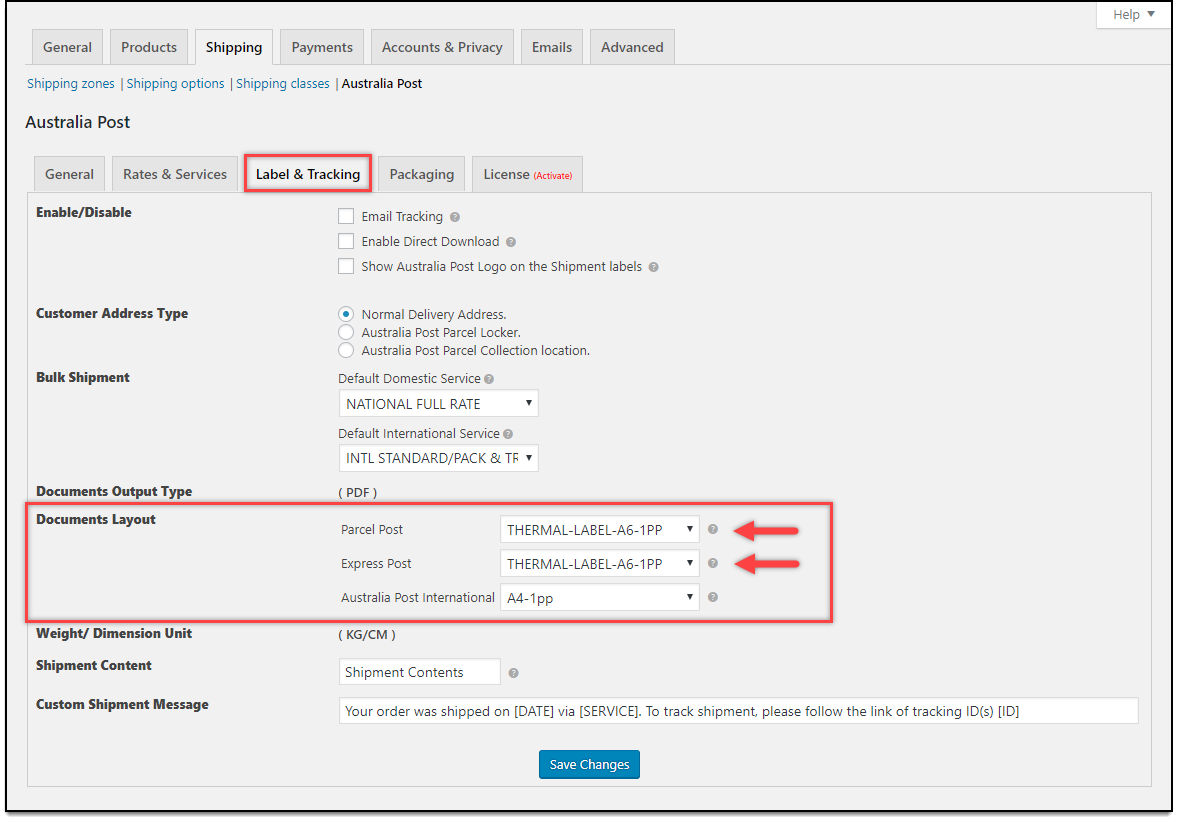
Step 6: In the Label & Tracking tab, you can choose to enable or disable services like Australia Post logos on shipping labels, Email tracking for your customers and direct download of shipping labels and other documents onto your machine.
Step 7: Choose the Document Layout for Parcel Post, Express Post, and Australia Post International shipping services. You can also use the Shipment Content field to provide a declaration for customs.
Step 8: The plugin also lets you choose a WooCommerce Australia Post shipping service as defaults for international and domestic shipping.
Setting up Bulk Printing:
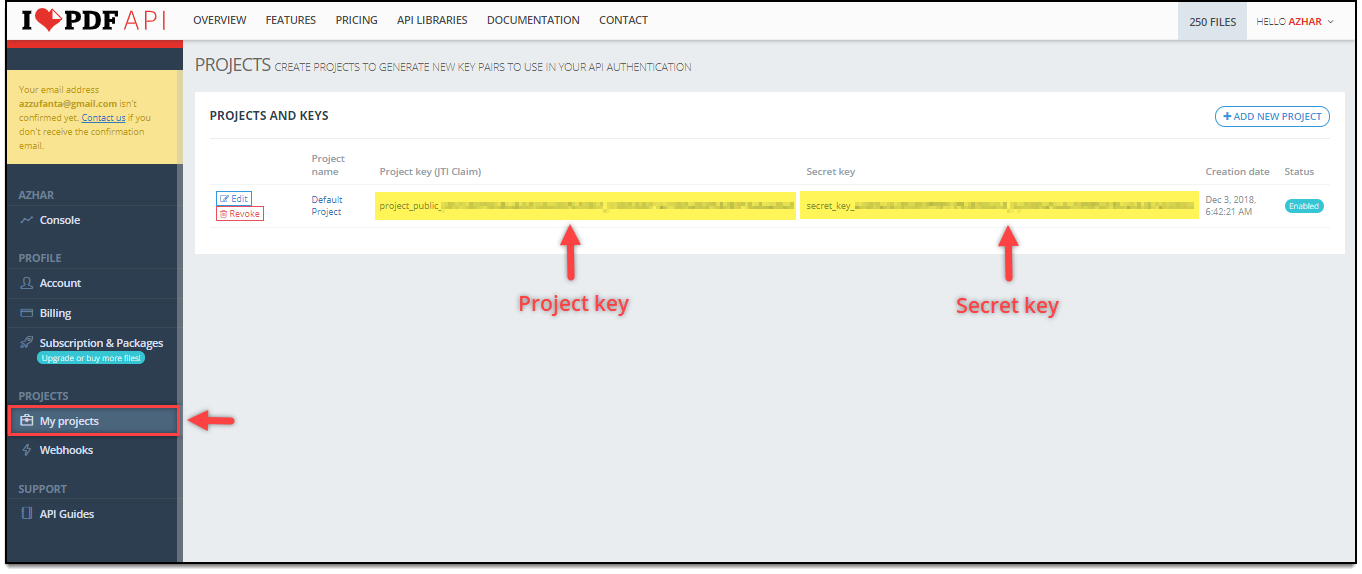
Step 1: Log into your iLovePDF account and go to My projects from the left sidebar menu. There will be a Project Key and Secret Key. Simply copy over the keys and paste in ELEX WooCommerce DHL Shipping plugin settings.
Step 2: Download, install and activate the add-on. When the add-on is activated on your WordPress site, a new section appears in the General section of the plugin settings. Here, you can enter your iLovePDF Keys in the respective fields. 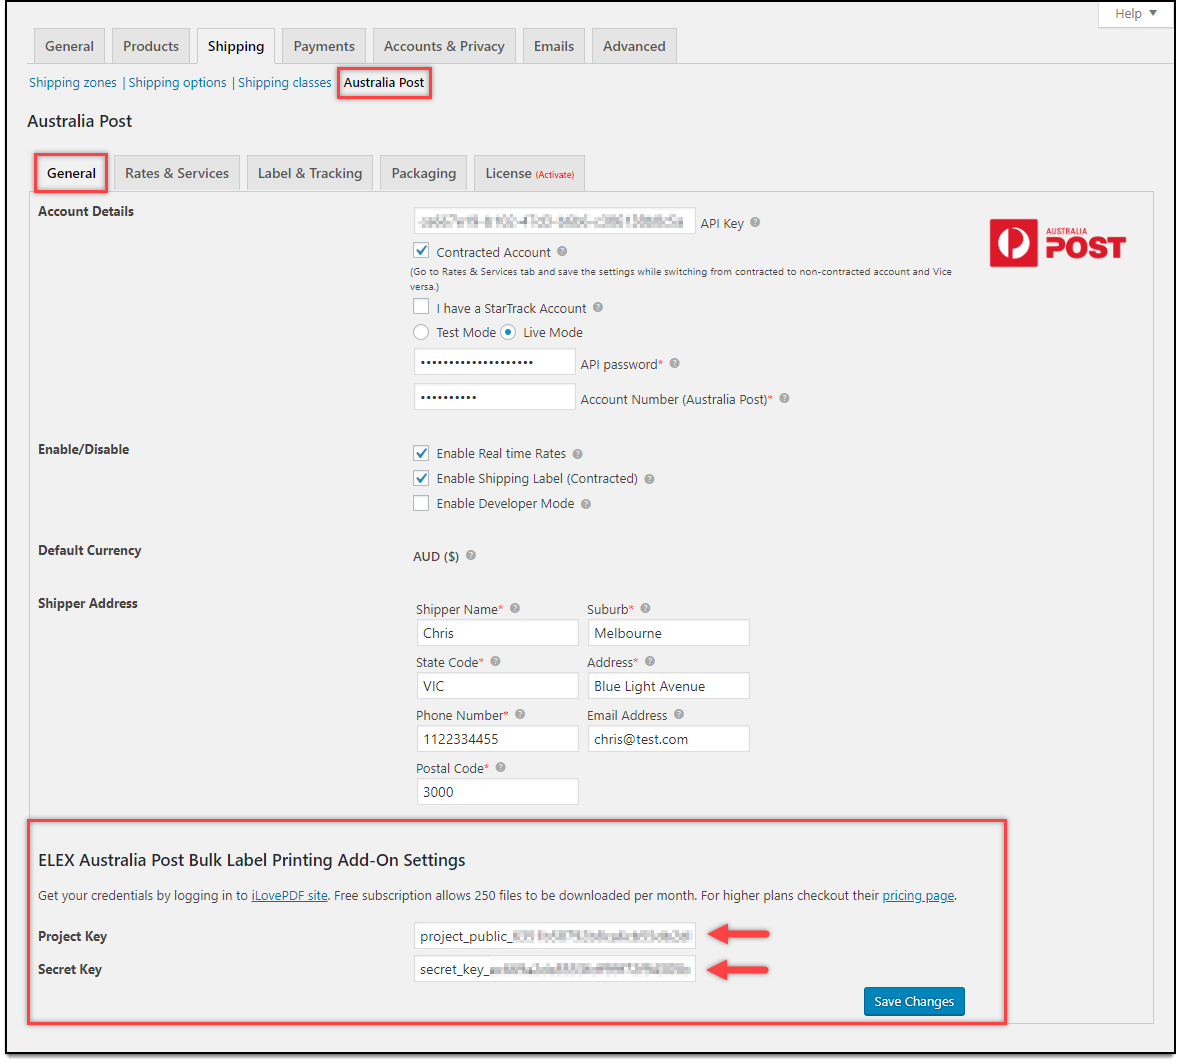

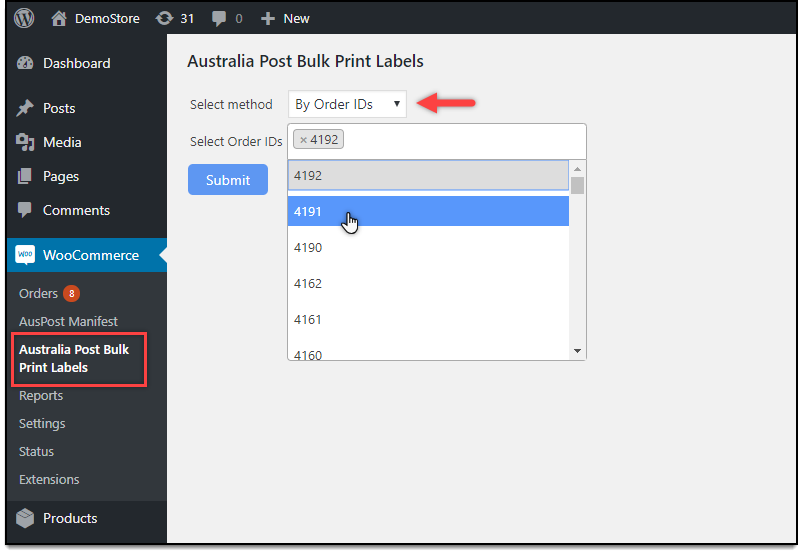
Step 4: You can select the orders that you wish to be included in the consolidated PDF using the Select By Order ID or Date Range fields. To select orders by ID, you need to set the Select Method to By Order IDs.
You can make use of the By Date Range selection method to include all of the orders placed between a start and end date. 
Conclusion:
Printing shipping labels are an integral part of WooCommerce Australia Post shipping. Configuring WooCommerce to print shipping labels in bulk will help improve operational efficiency. The ELEX WooCommerce Australia Post Shipping Plugin with Print Label & Tracking can be downloaded for free here.

