Many eCommerce company owners find pricing to be a difficult task. When you own an online business, you frequently question if your pricing approach is the most effective. Giving customers the option to choose their own prices might be a great method to solve your pricing concerns.
Customers will feel much more in control when shopping at your store if you provide price freedom. You can quickly figure out how much people are willing to pay for your products. You may also use this option to generate finances and contributions, where clients must be able to choose how much they want to spend. For example, donations.
In this post, we’ll show you how simple it is to install and use the WooCommerce Name Your Price plugin on your WordPress site.
A brief overview of the WooCommerce Name Your Price plugin
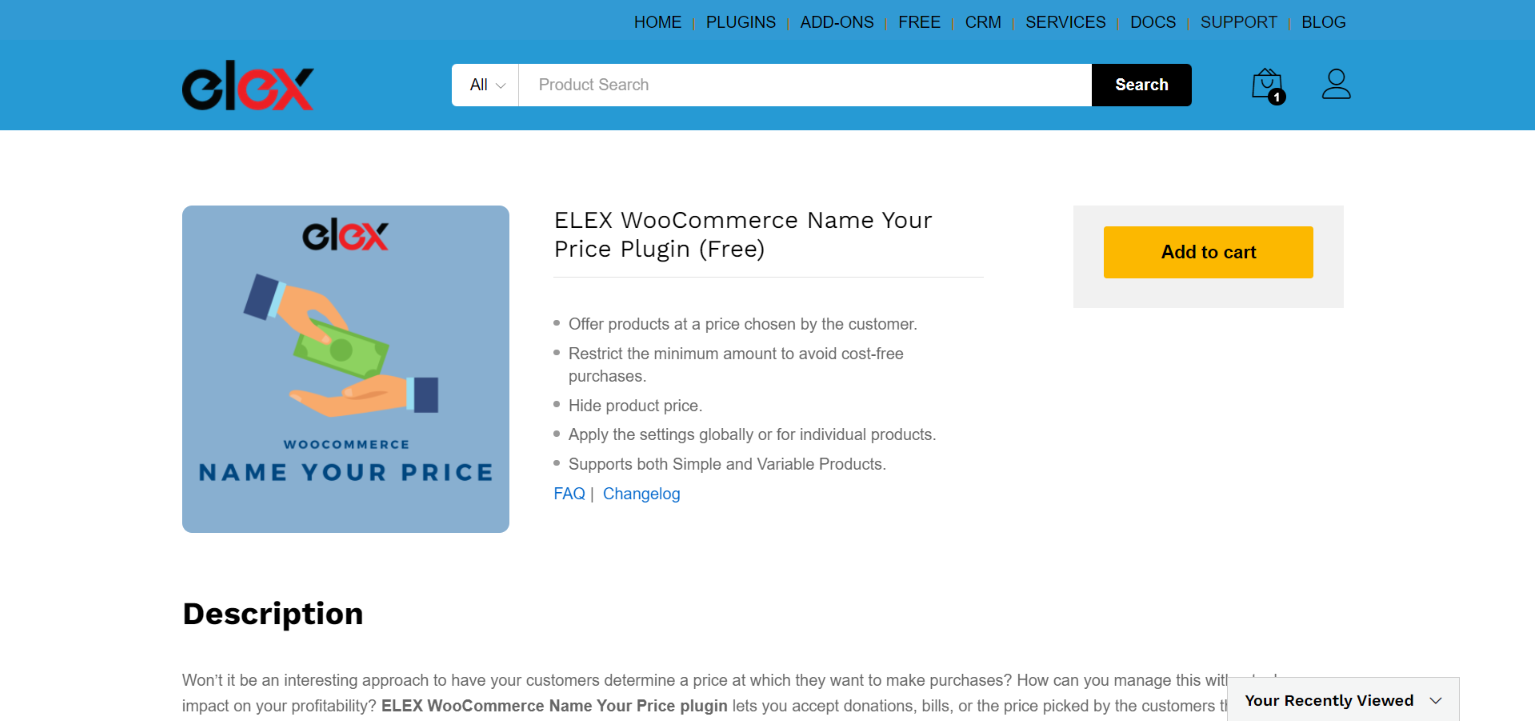
The ELEX WooCommerce Name Your Price plugin allows your customers to name their own price for your WooCommerce products. When it comes to pricing your products, the plugin gives you a lot more flexibility. Customers on your WooCommerce site have the option of suggesting a price for your goods. In order to avoid losing money by providing your customer’s pricing discretion, store owners can also impose a minimum acceptable price. This plugin is an excellent tool for analyzing the market and determining how much your customers are willing to pay for your products.
Here are some of the important features of the plugin:
- Display custom text after (Suffix) and before (Prefix) the product price.
- Quick Discounts can be applied to your product pricing.
- Set individual product prefixes, suffixes, and discounts.
- Show the price range of variable products’ minimum and maximum prices.
- Excellent compatibility with ELEX Plugins.
Let’s take a look at how to effortlessly set up the WooCommerce Name Your Price plugin for your WordPress site.
Setup WooCommerce Name Your Price for Your WordPress Site in a few Easy Steps
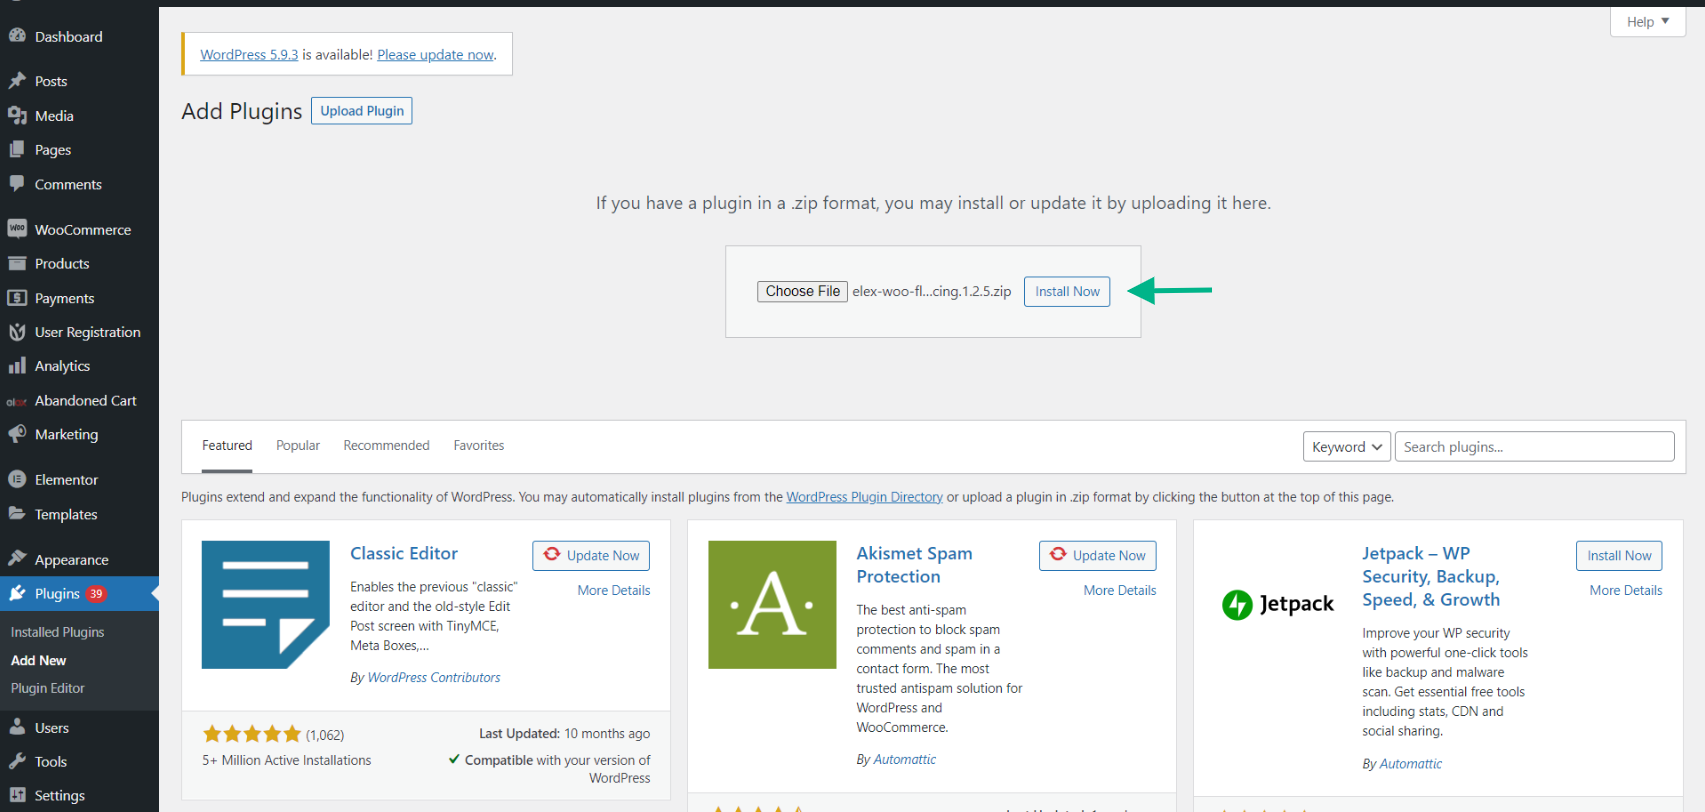
Start by installing and activating the free plugin. To do so, download the ELEX Name Your price plugin from the ELEXtensions or WordPress website. After the download is complete, install the plugin by going to your WordPress Dashboard > Plugins > Add new > Upload Plugin > Install Now.
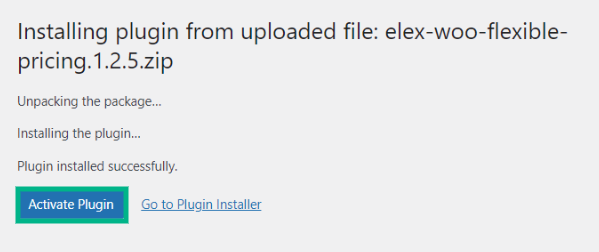
After the installation is complete, click Activate Plugin.
Now that the plugin is active. Let’s move on to the step-wise process of setting it up.
Step 1: Access the plugin
In order to access the plugin, go to the WordPress Dashboard > Plugins > Installed Plugins > ELEX Name Your Price Plugin > Settings in the admin settings. You may also access the plugin by going to WordPress Dashboard > WooCommerce > Settings > Name Your Price.
Step 2: Customize the settings to your preference
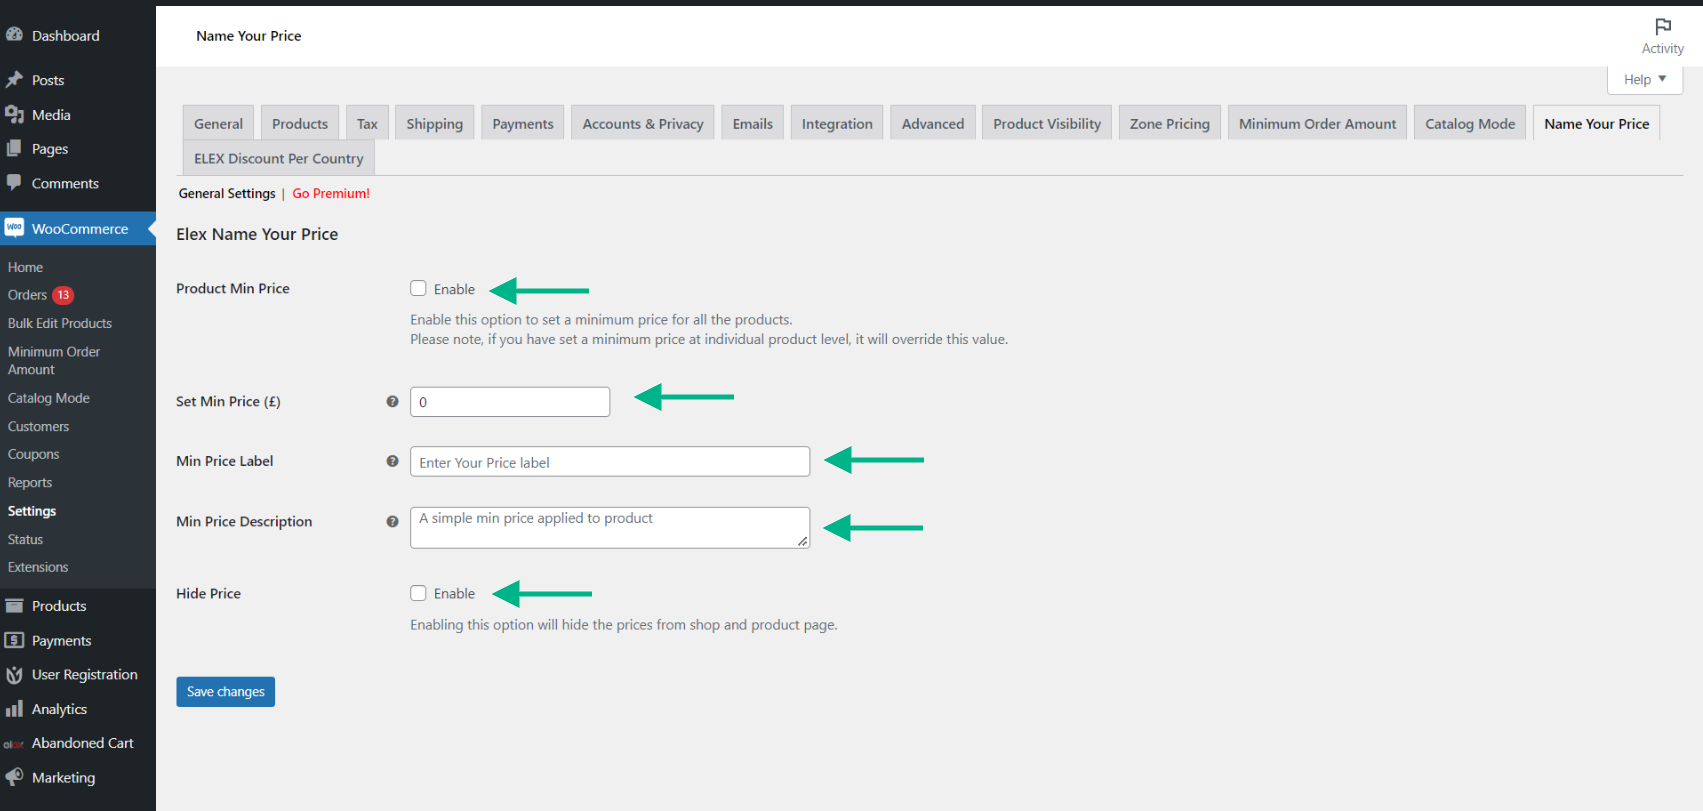
To allow clients to specify a price at which they wish to purchase a product from your store, enable the Product Min Price.
Then, in Set Min Price, enter the minimum price. This is the lowest price at which you want people to be able to acquire your items. If necessary, you may also leave it blank. If you leave it blank, you’re allowing your buyer to pay whatever price they want for the product.
The consumer will be unable to complete the transaction if the amount entered is less than the minimum price you have set. A notification will appear instructing you to enter a sum that is larger than or equal to the minimum price you have set.
Next, enter the Min Price Label, which is a custom text that will appear alongside the section where the buyer must enter the minimum price.
In the Min Price Description section, type a custom description that will be presented to buyers.
Another feature is the Hide Price checkbox. This option allows you to remove the price from the product page. The consumer will only see the minimum price you have set for the product, as well as the ability to enter their desired price for the product.
Once you have completed customizing the settings to your preference, click Save Changes.
Below, we have demonstrated the plugin in action with examples…
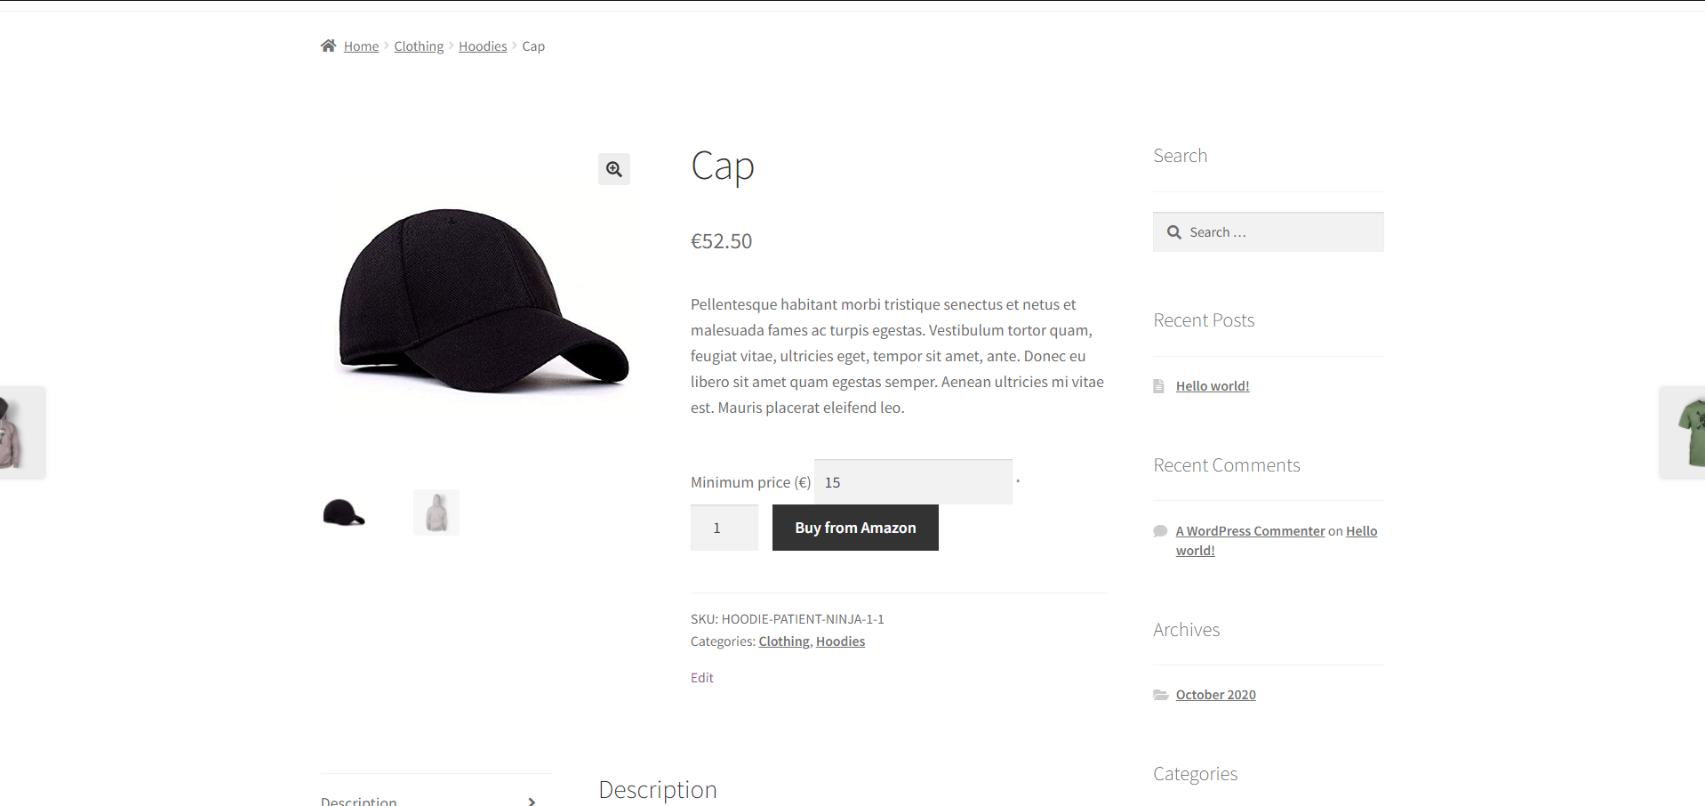
We have enabled the minimum price setting and set the minimum price to $15 on a cap that is $52.50 with the “hide price” setting not enabled.
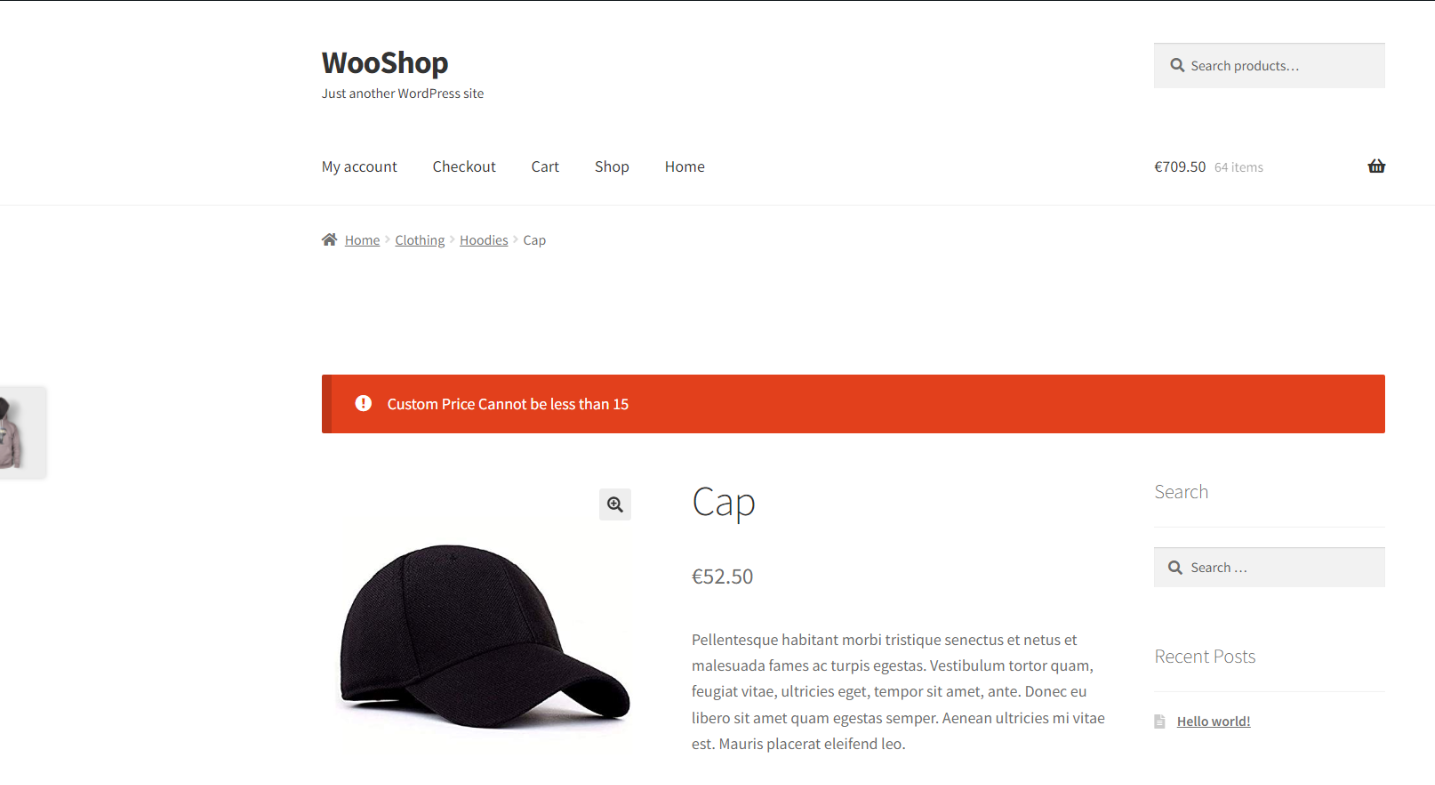
If the customer enters a price less than $15, the page will display a custom message that reads “Custom price cannot be less than $15”.
Adding the Feature to Individual Products
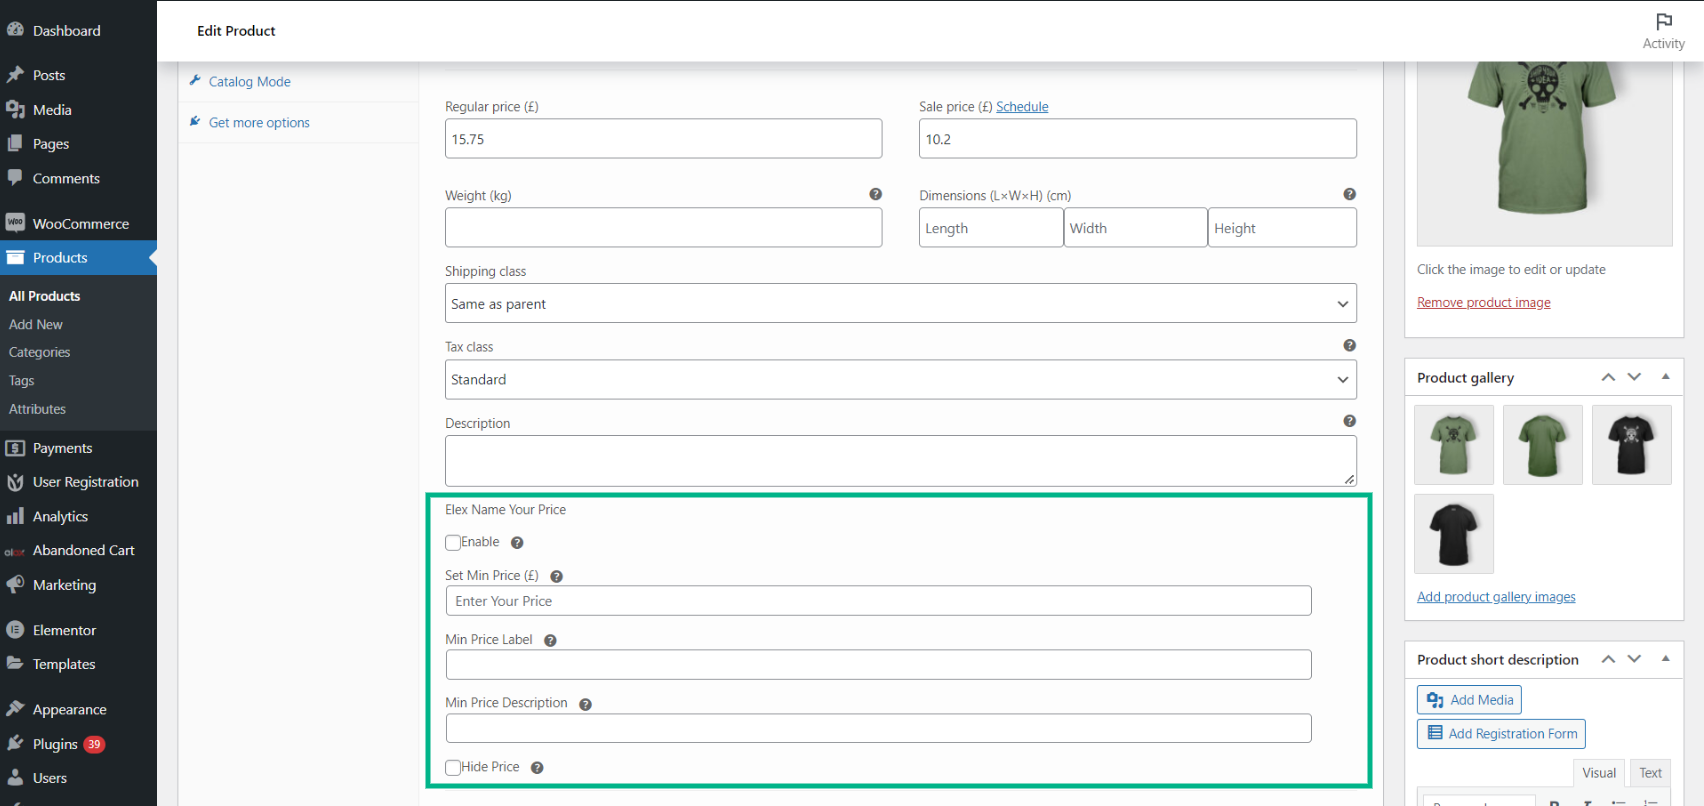
You also have the ability to define the minimum price at the individual product level, depending on your store’s needs, after you enable the plugin. All products will thereafter be eligible for the global minimum price you specify on the plugin dashboard. To do so, navigate to the WordPress Dashboard > Products and select a product you want to set the minimum price for.
Click Edit under the product and scroll down to the product data metabox and go to the General tab. And set the minimum price under the Name Your Price section.
Adding the Feature to Individual Product Variations
For products that include variations, follow the same steps as above, but go to the Variations tab instead of the “General” tab. Now set the minimum price under the Name Your Price section.
Conclusion
This is a step-by-step guide on installing the WooCommerce Name Your Price plugin on your WordPress site. With this plugin, you’re placing your store’s revenue in the hands of your loyal consumers by allowing them to set personalized pricing for the products they are interested in. It will not only pique your consumers’ interest in returning to your business for future purchases, but it will also increase their trust in you.
Further Reading
- How to Set Up Discounts per Country on WooCommerce Store?
- How to Set Up Custom Text for WooCommerce Product Price?
- How to Display Minimum & Maximum Amount Range for Each User Role on Your WordPress Website?
- How to Apply Discount per Payment Method in WooCommerce

