It will be very interesting for your customers if they can determine the price at which they can purchase a product. If you offer this option in your WooCommerce store, more customers will visit your store and grab the products they need at the desired price. In order to avoid losses, you can configure this option in a controlled environment. Since the WooCommerce plugin does not have any default option for this, you are required to adopt a third-party plugin.
In this article, we will be discussing how to set up custom user defined pricing in your WooCommerce store.
Why do you need user-defined pricing methods in your store?
Customers always like to purchase a product at the minimum cost. If they see the option in your store, they will definitely purchase products at the cheapest cost. This will attract new customers to your store. If you configure it in a controlled environment, you can definitely earn profit with this pricing method.
This pricing method can be used in your store for certain purposes. For example, if you are introducing a new product in the market, you can let customers choose the desired price to purchase that product. When you analyze the complete order list for that specific product, you will get an approximate idea regarding the pricing expectation of customers for that specific product.
Letting shoppers choose a price will definitely boost your sales and ROI. Moreover, it will help you to set a platform for virtual bargaining.
Now, let us check how to configure this specification on your WooCommerce store.
As I have already mentioned, you need to choose a WooCommerce plugin to implement this in your store.
Which plugin in the market helps to configure it efficiently?
ELEX WooCommerce Name Your Price Plugin
As the name suggests, it helps to configure the option on your store to let customers decide a price at which they wish to purchase. This is a free plugin as you can easily download it from the product page or WordPress repository.
Along with the main feature, it also helps you configure a minimum price that needs to be entered by the customers to proceed with the order. This will help you to avoid any kind of loss to your store.
And, you can hide the product price from the product pages when this option is activated in your store. In order to notify customers regarding the custom pricing method, you can add relevant custom texts on the product page.
Now, let us get into the configuration of this plugin.
Set Up Custom User Defined Pricing with ELEX WooCommerce Name Your Price Plugin
After downloading the plugin, go to your WordPress dashboard.
Then, go to Plugins > Choose Add New to upload the downloaded ZIP file of the plugin > Activate the plugin.
Once the plugin is installed and activated, go to the Dashboard > Plugins > Installed Plugins > ELEX WooCommerce Name Your Price Plugin > Settings.
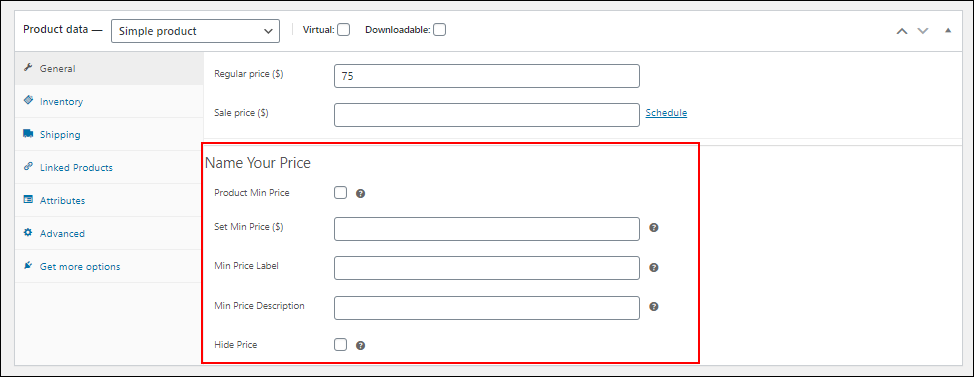
You can enable the Product Min Price option to activate a minimum price for all products in your store. You can also set the same option at the individual product level by configuring it from the product page dashboard.
If you have configured a minimum price for a specific product from the individual product page dashboard, that price will override the global value you have set on the General Settings dashboard.
After enabling the option, enter a desired minimum price on the Set Min Price field. If you set a price here, the customers can only proceed with the order if and only if they enter an amount greater than or equal to the configured amount.
You can add a custom price label and description to display them above and below the custom price field to give more clarity to the customers.
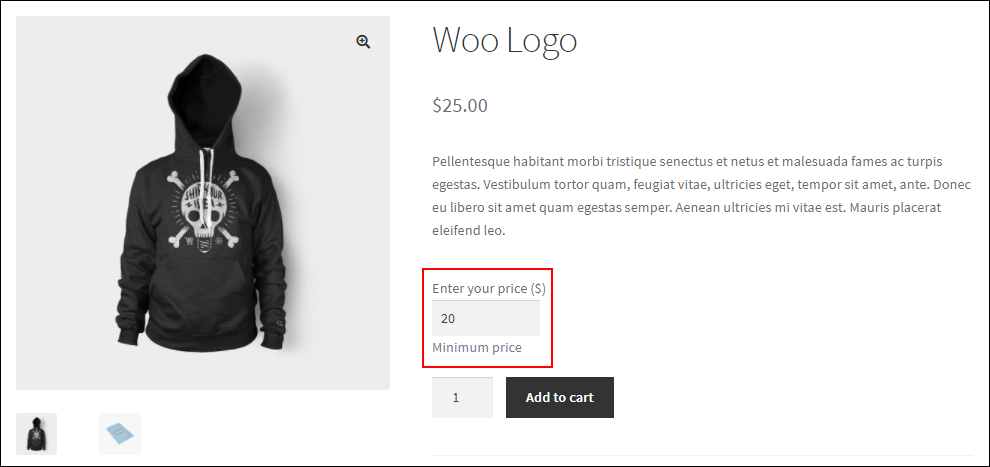
Check an example:
When you set the minimum price as $20, the amount will be displayed on the field by default. And, customers can only enter an amount that is equal to or greater than that amount. Also, the entered price label will display on top of the field, and the description will display below the field.
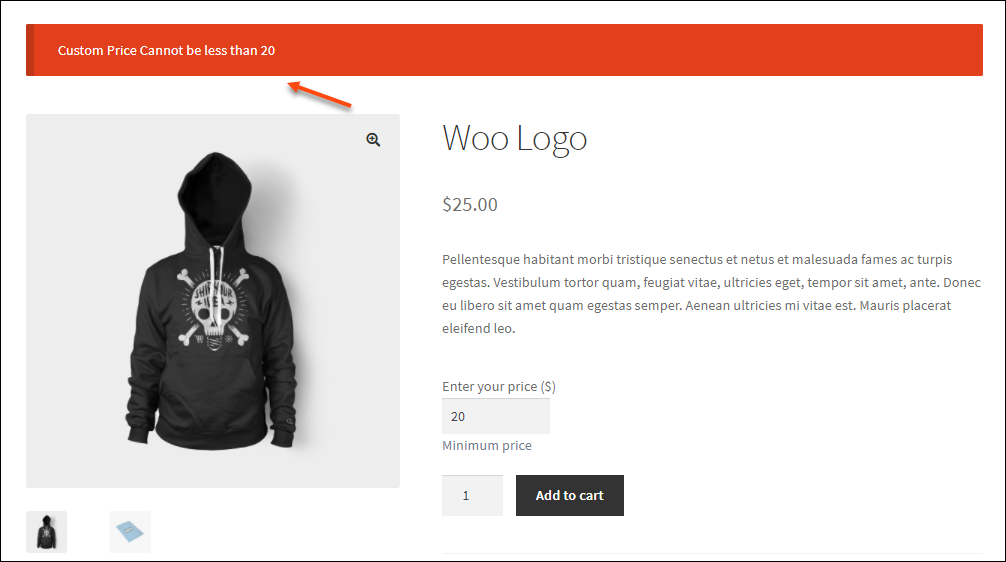
If the customer enters an amount that is less than the configured minimum price, a message will be displayed to enter an amount greater than or to proceed with the default minimum price displayed on the field.
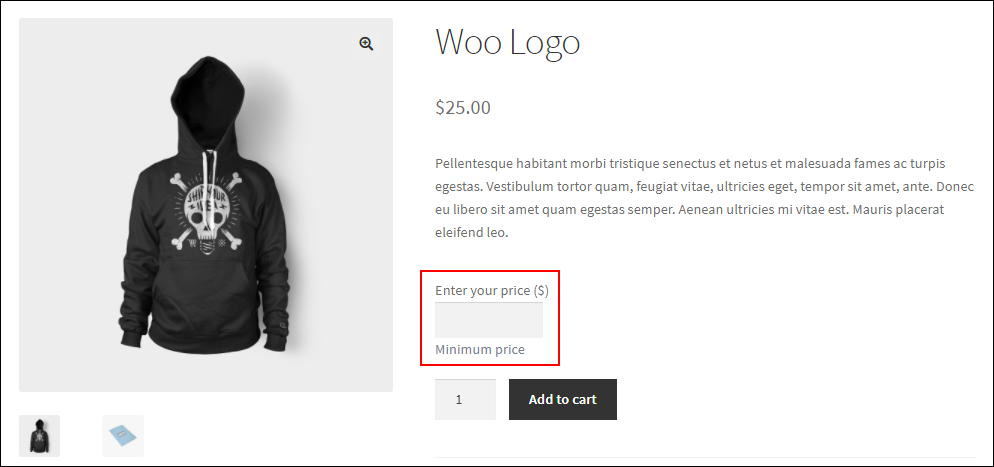
If you leave the minimum amount field empty on the General Settings tab, customers can enter any amount they like.
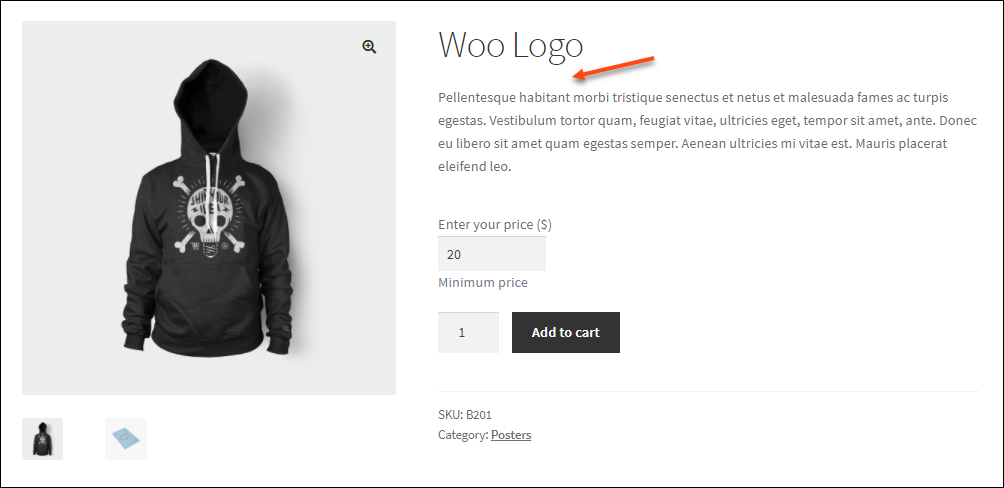
You can hide the product price on the product page by enabling the Hide Price option.
After saving the changes, it will hide the product price from the product pages.
The same options can also be set for individual product pages.
Go to the product dashboard and add the required details. The values you enter here will override the values you have set on the General Settings tab.
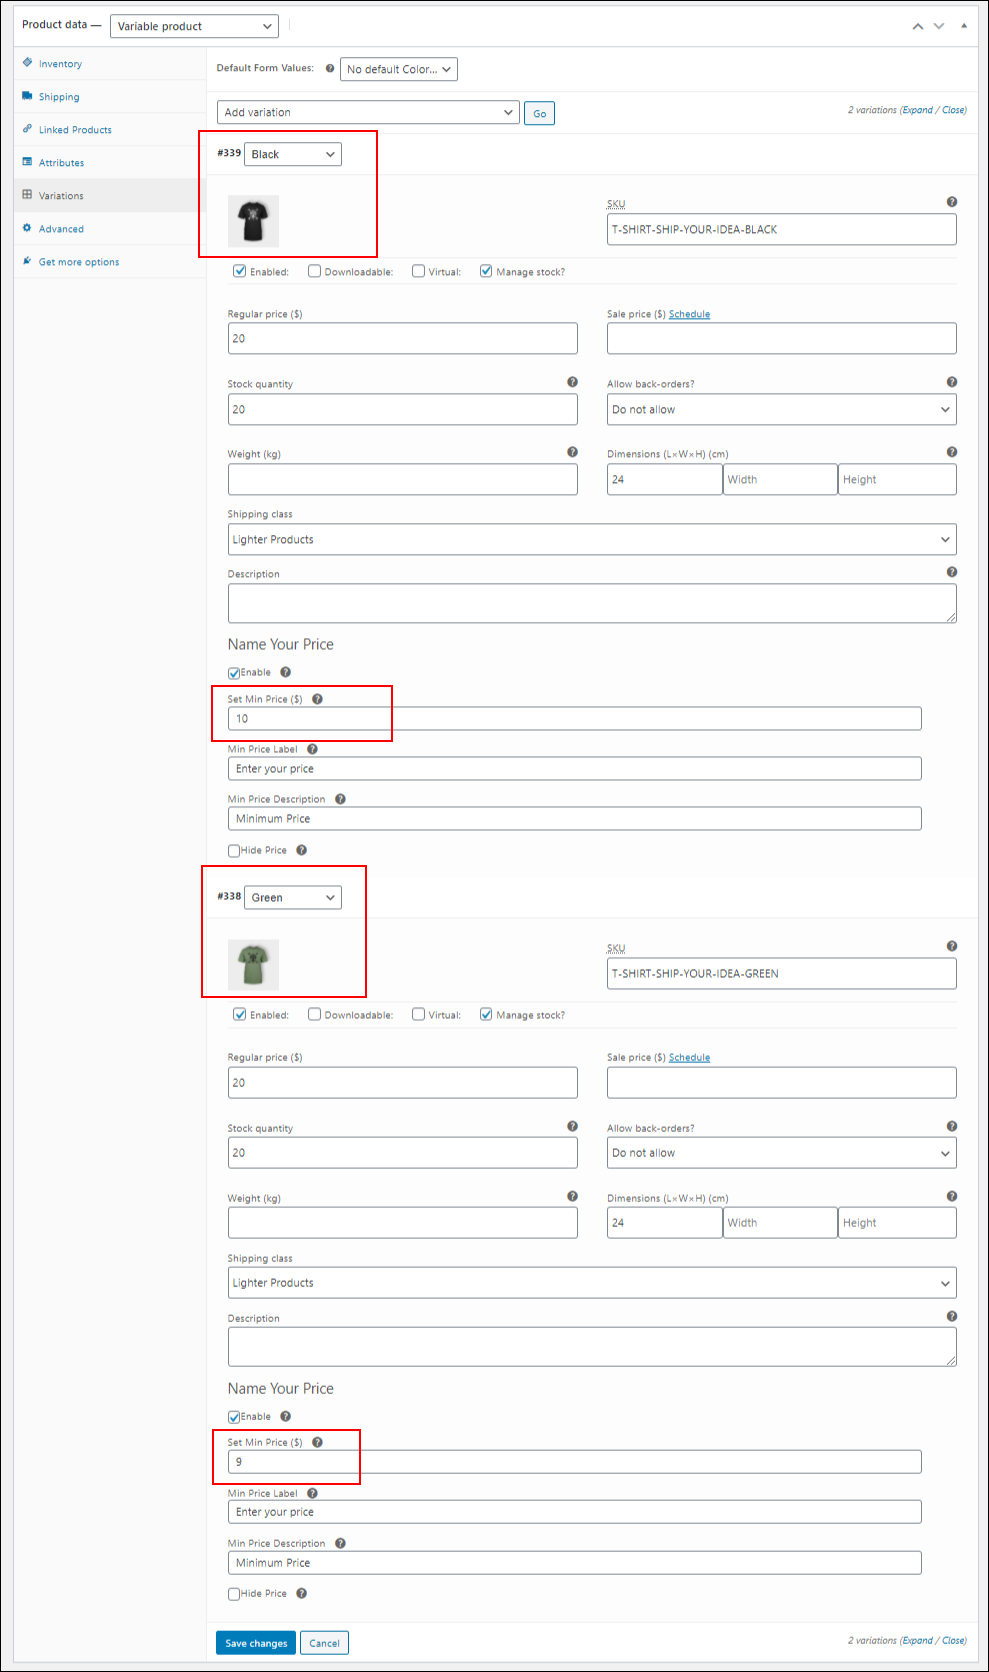
You can configure different minimum prices for different variations for variable products. To configure that, go to the variable product page dashboard and enter the minimum price as well as other options if required.
Here, I have taken 2 variations of the product Ship Your Idea.
I have entered $10 as the minimum price for its variation Black, and $9 for its variation Green. Similarly, you can set different labels and descriptions if required. And, hide the prices of products according to the requirements.
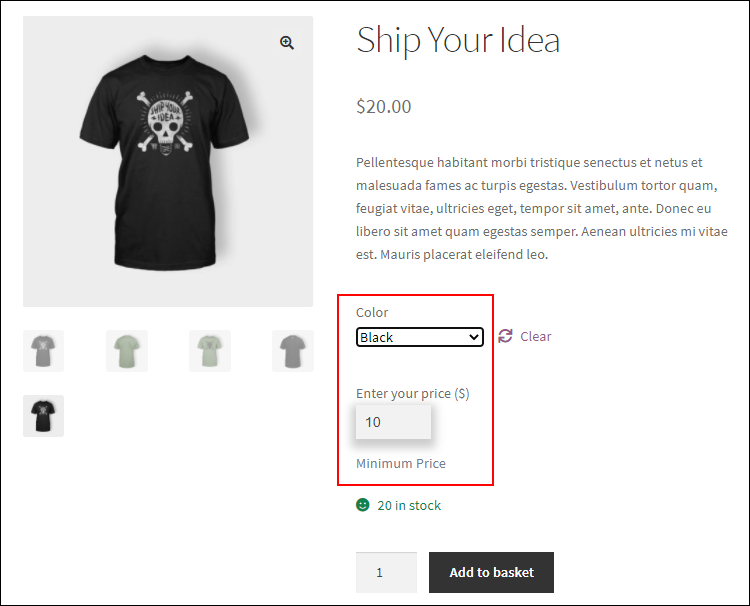
After saving the changes, if the customer chooses the variation Black, they need to enter an amount greater than or equal to $10.
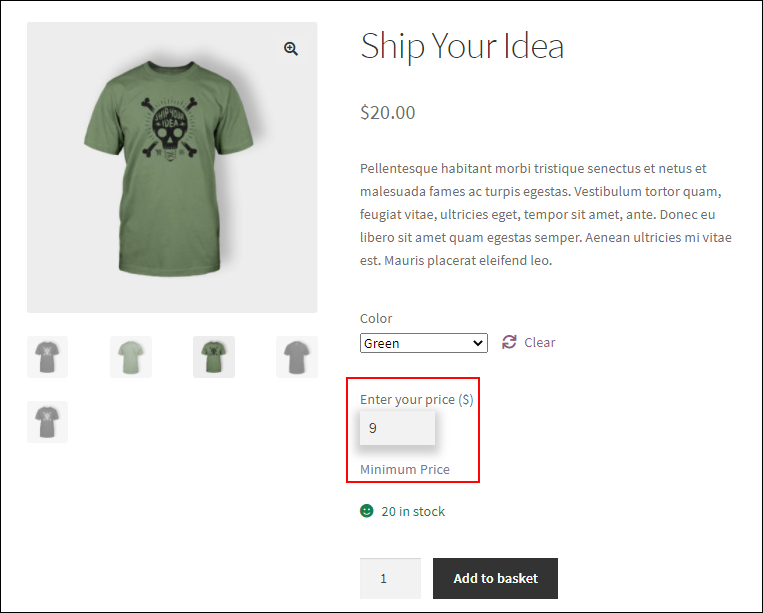
If the customer chooses Green, they need to enter an amount greater than or equal to $9.
This is how you can configure the custom user defined pricing with ELEX WooCommerce Name Your Price plugin.
To sum up,
In order to control the customers from entering an amount that will cause a loss to your store, it is ideal to set a minimum amount when you configure the option to let the customers decide the product price. And, hide the price of the products if you do not wish to show the actual price of your products with this robust plugin.
Further Reading:
- Setting up WooCommerce Name Your Price – A Complete Guide
- How to Create a Simple bill Pay System using WooCommerce Name Your Price?
- How to avoid free purchases while using WooCommerce Name your Price plugin
- Accept Donations using WooCommerce Name Your Price Free Plugin
- How to set up WooCommerce Name Your Price for Your WordPress Site?


