Most shoppers like to buy products at the minimum possible price. It will be more exciting for them if you let them determine a price at which they can purchase the products. If the price is a bit higher than expected, they can negotiate by entering the desired price on a custom field that you provide. In order to avoid any losses on your WooCommerce store, you can configure a threshold price to let the customers enter a price, which is greater than or equal to the amount. This concept is called ‘Name your price’ in the eCommerce world! So, in this article, let us discuss how to add a custom price field in your WooCommerce store for a single product page.
That is, you can configure the custom price field option on all products in your store by integrating a robust Name your price plugin available for WooCommerce stores. With the same plugin, you can set this option for selected products exclusively.
Why do you require the ‘Name your price’ option in your store?
Customers like flexible pricing and the idea of getting the products they like at the cheapest possible cost. If you provide this option in your store, more customers will get attracted to your store. It will improve the traffic flow towards your store, and thereby, will increase the sales and ROI of your business.
Since you can add a minimum price to be paid by the customers, there won’t be any loss for you. You can use this option for specific products to sell them quickly for restocking new products. The same option can be used to sell the products, which did not get expected market demand.
This custom field can also be used to check customers’ purchasing trends. Letting them decide a price to purchase the new product you have just launched will give you an approximate idea of how much they will spend on the product.
Well, which is the most efficient and robust Name your price plugin in the market?
ELEX WooCommerce Name Your Price Plugin
You can easily download this free plugin from its product page or the WordPress repository. The major features of this plugin are as follows:
- Allows providing an option for customers to enter the desired price for purchasing products.
- Avoids zero price purchases by adding a minimum product price.
- You can hide the actual price from product pages.
- Works seamlessly with simple as well as variable products.
How to add a custom price label field in your store using ELEX WooCommerce Name Your Price Plugin?
First, you need to install and activate the plugin in your WooCommerce store. For more details about these procedures, refer to the article – How to set up ELEX WooCommerce Name Your Price Plugin?
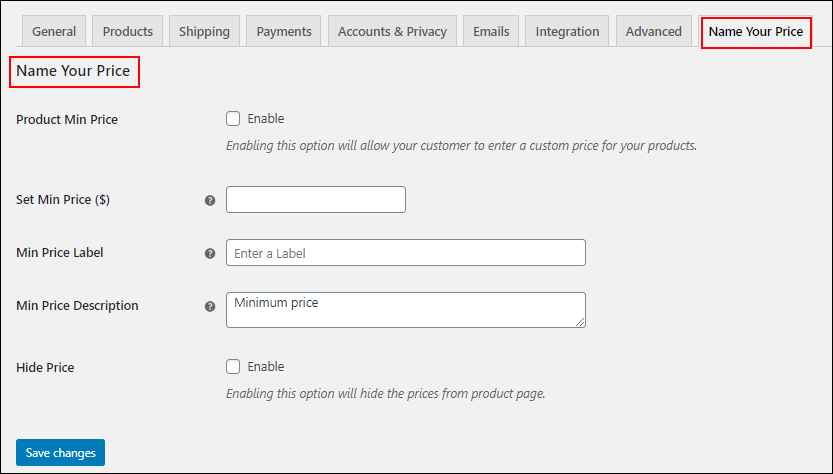
After the activation of the plugin, go to your WordPress Dashboard > Plugins > Installed Plugins > ELEX WooCommerce Name Your Price Plugin > Settings.
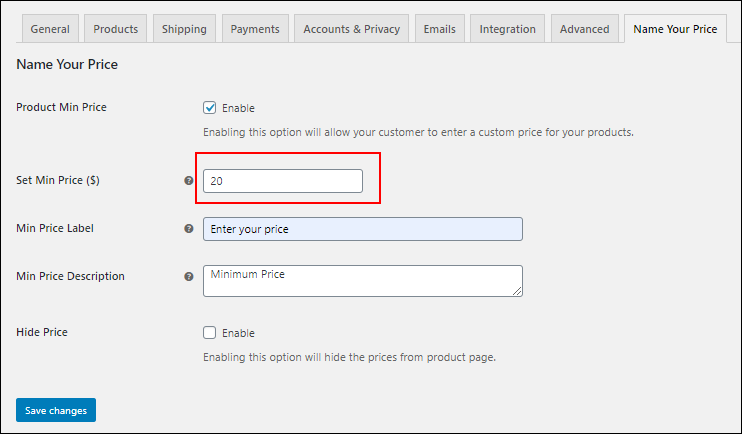
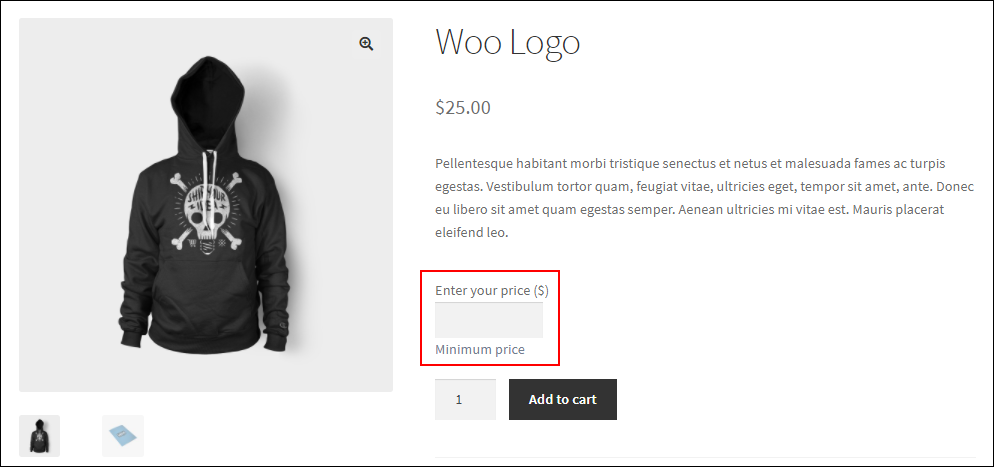
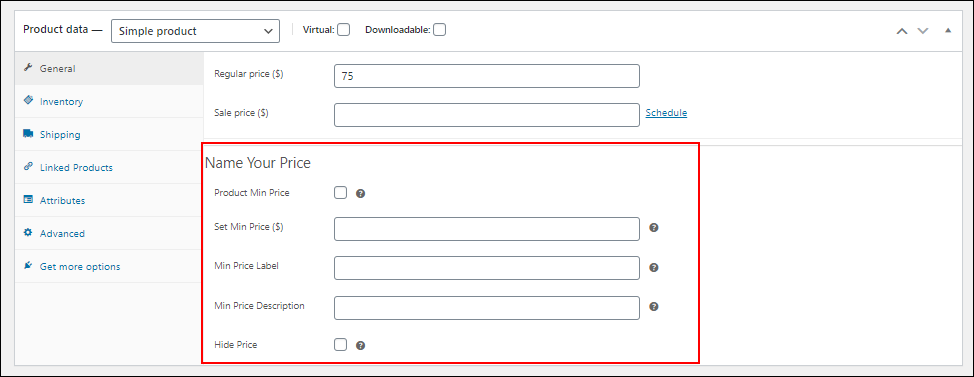
To set a minimum threshold price to be paid by the customers, you need to enable the option Product Min Price. After enabling the option, enter the price in the Set Min Price field. You can also enter a custom price label as well as a description to be displayed above and below the custom price field to give more details to the customers. You can also enable the Hide Price option for hiding the product prices from the product pages.
Check an example:
In the above example, I have added the minimum price as $20, and a custom label and description to be displayed along with the price field.
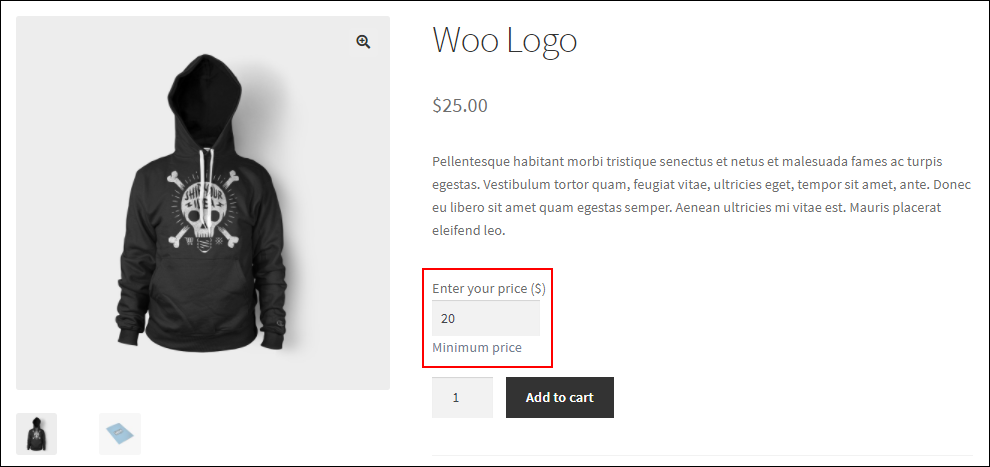
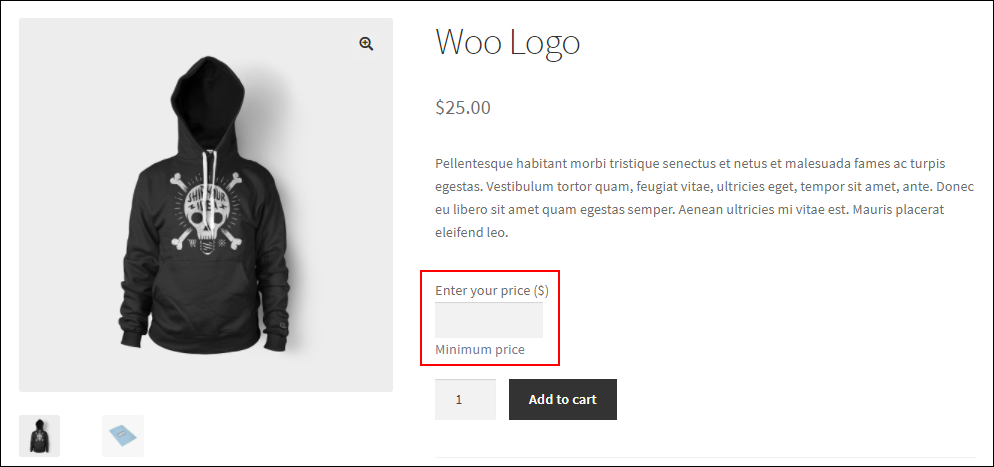
After saving the changes, it will reflect on the product pages as displaying the minimum price on the field by default.
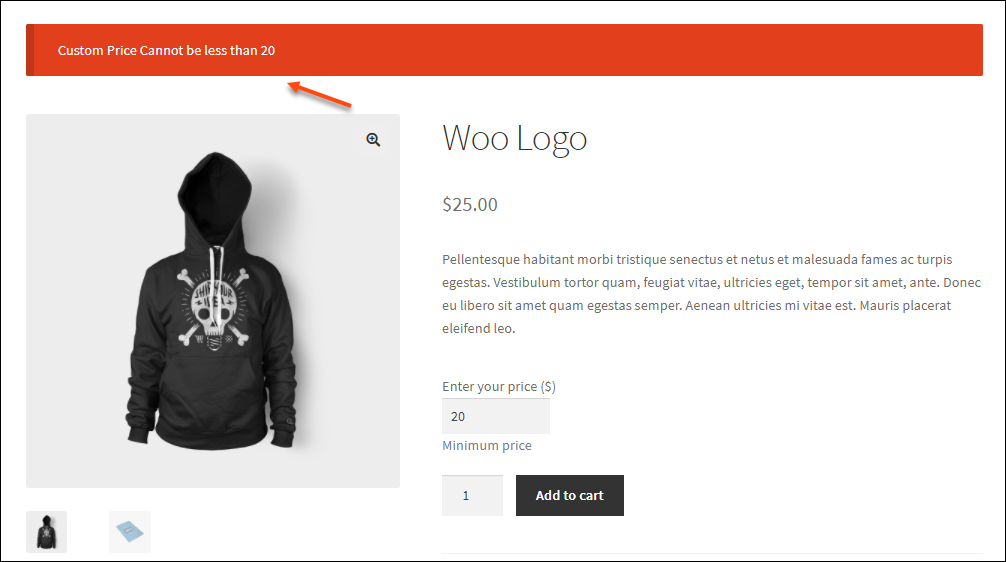
As per the above example, the customer must pay a minimum of $20 to proceed with the purchase. If the customer enters a price that is less than the minimum amount, a message will be displayed to inform the customers to enter an amount greater than or equal to the minimum amount.
If you did not configure any minimum price on the plugin dashboard, customers can enter any amount to proceed with the purchase. They can even enter 0!
If you have enabled to hide the product price from the product pages, the actual price of the products will not be displayed on the product page.
All these configurations will reflect on the entire store.
How to add a custom price label field on a single product page?
The same plugin can also be used to apply the custom price field for specific products individually. After the plugin has activated on your store, the same basic settings options will be available on all individual products. From there, you can configure these options exclusively for those products.
Go to the product page dashboard of the product you need to feature the custom price field. And, go to the Product Data meta box > General.
You can enter the details as discussed above to reflect the changes on specific product pages.
If you have configured the settings globally on the plugin dashboard and configured the custom field settings on some products individually, the product level settings will override the global settings.
This is how you can add the custom price field on single product pages.
You can also configure the custom price field, minimum product price, and other options of the plugin for all variations of a product separately.
For setting the custom price field for specific product variations, go to the product page dashboard > Variations.
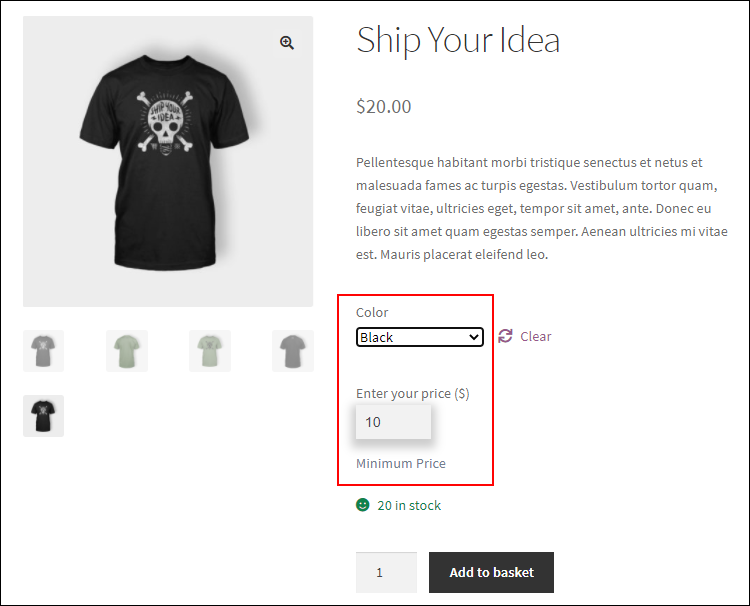
As you can see in the screenshot above, I have taken 2 variations of a product such as Black and Green. For Black, I have entered $10 and for Green, I have added $9 respectively. Similarly, you can also configure other options like hide price and custom labels as per your requirements.
If the customer has chosen Black from the options, $10 will be displayed as the minimum price to be paid by the customers.
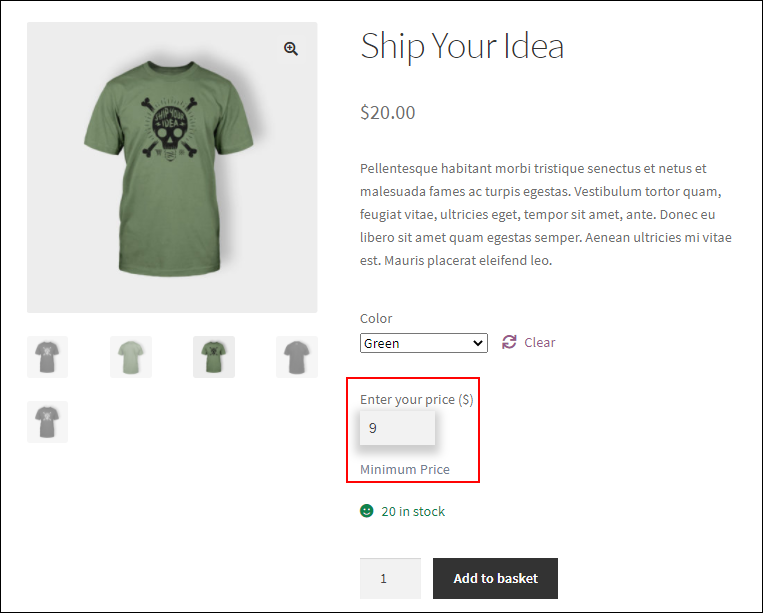
If they have chosen Green, they need to pay a minimum price of $9 for that variation.
This is how you can set up a custom price field in WooCommerce for a single product page with the ELEX WooCommerce Name Your Price plugin.
To sum up,
Letting the customers determine a price will drive more customers to visit your store and grab the products at a minimum price. This will definitely improve the traffic flow to your store. And, when more customers visit your store, there will be more sales and increased ROI.
Further Reading:
- Setting up WooCommerce Name Your Price – A Complete Guide
- How to Create a Simple bill Pay System using WooCommerce Name Your Price?
- How to avoid free purchases while using WooCommerce Name your Price plugin
- Accept Donations using WooCommerce Name Your Price Free Plugin
- How to set up WooCommerce Name Your Price for Your WordPress Site?
- How to Add a Custom Price Field in a WooCommerce Product?
- All About Setting Up WooCommerce Custom Price Field
- How to Add Custom Price Field to WooCommerce Product Category Page?

