What can we help you with?
How to Configure Parcel / Box Packing for WooCommerce UPS Shipping?
You probably got a better idea on displaying live UPS shipping rates on your WooCommerce store as well as printing shipping labels directly from your store from our other articles. Now, we will look into the process of configuring parcel / box packing for WooCommerce UPS Shipping.
Parcel / Box Packing for WooCommerce UPS Shipping with ELEX EasyPost Plugin
Watch the video below or read on…
You can access the parcel packing options on the EasyPost plugin by going to WooCommerce > Settings > Shipping > EasyPost, and then clicking Packaging tab.
Here, you will find three options for packing your shipments. These are:
- Pack items individually – In this option, each item will be individually packed in separate boxes. The total shipping cost of an order will be calculated by adding the shipping cost of each item. If a customer purchases 5 items in an order, each of these items will be packed in separate packages. Accordingly the shipping rate also will increase. For example, the shipping cost for a particular UPS service is $10, then a customer purchasing 5 units of that item, will be charged $50 as shipping charges.
- Pack into boxes with weight and dimensions – In this scenario, you will able to define custom box sizes, to pack items. You can define multiple boxes based on the the weight and dimensions of your products. The plugin will automatically choose the best box for a particular order based on what you have already defined. That means, if you have a custom box that will include all the five units of an item in an order, you can offer your customers a much lower shipping rate.
- Pack items based on weight – Weight based packing method will be useful when you want to pack items based only on their weight and not dimensions. You can use this method in several scenarios, where you need to pack materials in bulk purely based on weight. Here you can define a Box Maximum weight, which will be the maximum weight that will be packed into one box. For example, if you have a product with weight 2 pounds, and you define the Box Maximum weight as 10, 5 items of this product will be packed together. You can also choose the packing process here.

Example scenario
Let us take a look at an example scenario with each of these options. Suppose a customer is purchasing 3 units each of the following products.
- Beanie (weight 0.5 lbs or 8 oz)
- Hoodie with Zipper (weight 1 lb or 16 oz)
- Hoodie with Logo (weight 1.5 lbs or 24 oz)
The dimensions for all three products are set at 2×2×2 (length×breadth×height)
Let’s look at the settings and outcomes for each of these parcel packing methods
Pack items individually
You simply have to choose this option under the Parcel Packing settings. Each item in an order will be packed individually. The shipping rates displayed on the cart and checkout pages too will be based on this.
When multiple items are present in an order, the shipping rate will be considerably high when you choose ‘pack items individually’.

When you receive an order, you can generate the packages from the order detail page, and it will look like the below screenshot.

Pack into boxes with weight and dimensions
When you choose the second option, a new field will be displayed, where you can enter the box dimensions. You will be able to enter both outer and inner dimensions here. The outer dimensions are of the box, while inner dimensions define the product. Here, you can also include the weight of the box, if that is considerable. You can also specify, the maximum weight allowed in a particular box, so that packing will consider the weight of the product as well. This would mean that both dimensions and weight of a product will be considered when an order is automatically assigned a custom box.

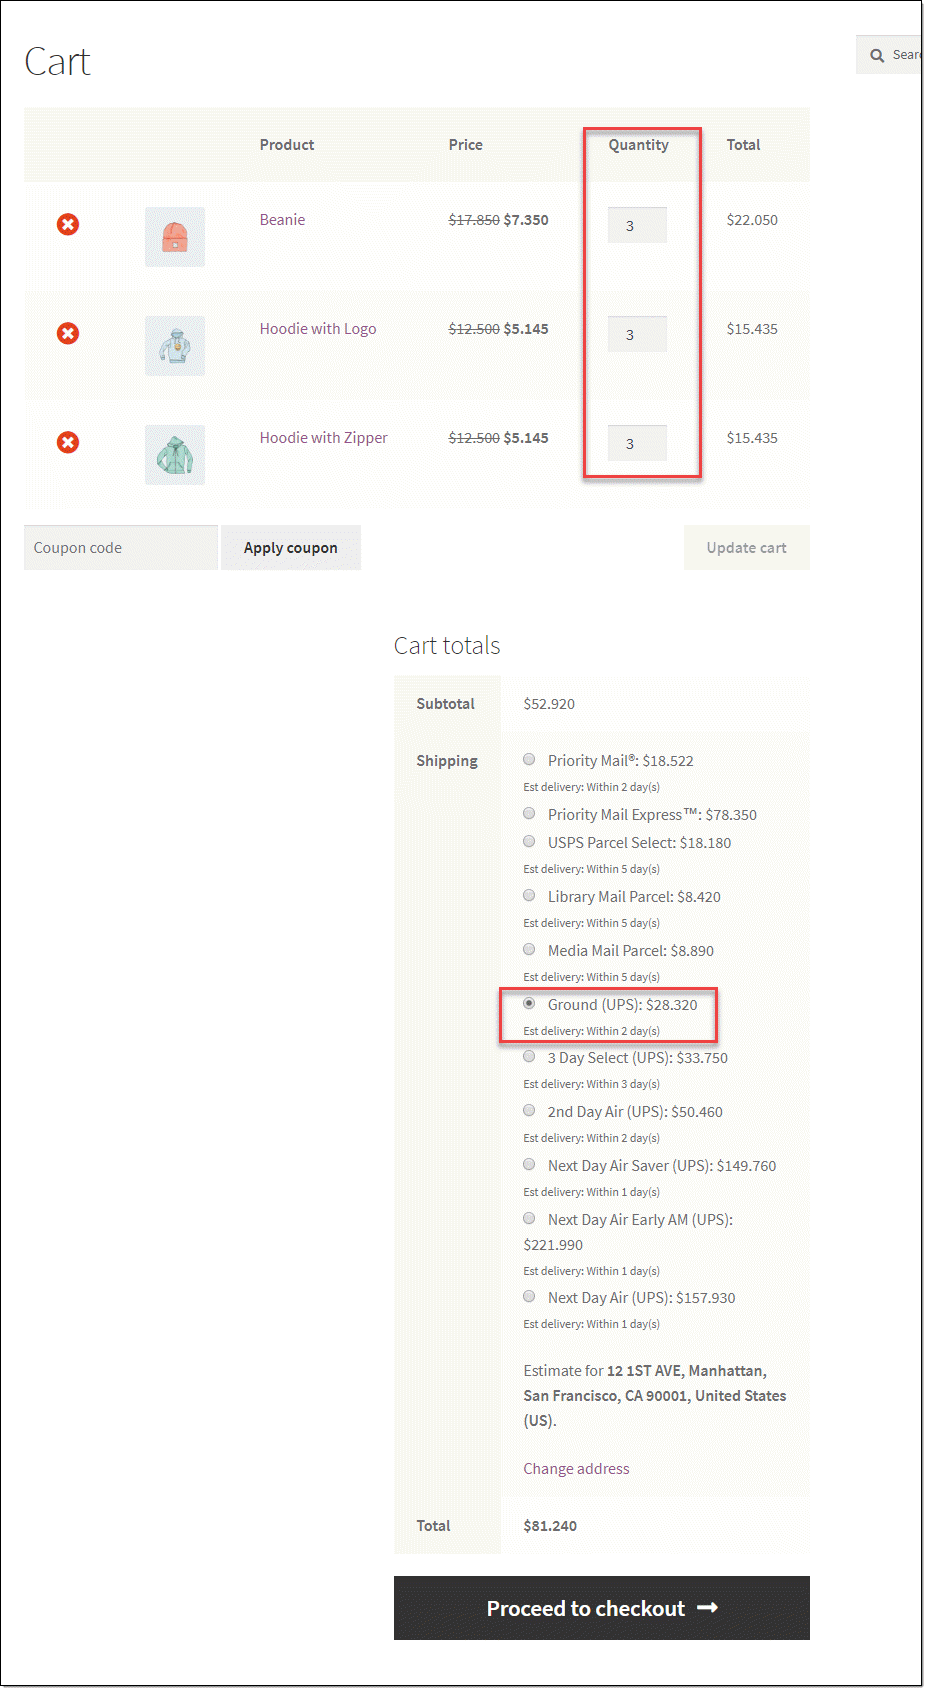
Now, on the Cart page, the rates are displayed as in the screenshot below:

After you receive the order, when you generate shipment, you can see all the items in the order is packed into a single box.

Pack items based on weight
When you choose this option, you can specify a maximum weight for the box, and also specify the way items will be packed inside the box. The options for packing are
- Pack heavier items first: In this option, heavier items will be packed first, followed by the lighter items, if an order has multiple products with varied weights.
- Pack lighter items first: In the second scenario, lighter items will be packed first followed by heavier items.
- Pack purely divided by weight: Here items will be packed purely divided by the total weight of the order.
In this example, we are keeping a box maximum weight of 6 lbs, and choosing ‘pack lighter items’ first.

The Cart page will display rates based on the weight of the items.
Now on the order detail page, you can see the boxes are defined based on weight. Here you can see two packages are generated based on the maximum weight per box as well as the chosen packing process.
In this case, the lighter items are packed first. So the order will be Beanie, Hoodie with Zipper and then Hoodie with Logo.
In the first box, 3 units each of Beanie (3 × 8 oz) and Hoodie with Zipper (3 × 16 oz) are packed, along with one unit of Hoodie with logo (1 × 24 oz). The maximum capacity of the box is reached (6 lbs or 96 oz).
Now the remaining two units of Hoodies with logo will be packed in another box (2× 24 oz).

Once the packages are created based on the parcel packing settings, you can generate the shipment label and print them.
Checkout our other article to understand how to print UPS labels on your store.
You can find more details on plugin configuration in the documentation.
If you need any help, do not hesitate to contact our support team.