In this article, we will discuss the steps involved in configuring bulk printing of WooCommerce DHL Shipping labels on your WordPress site. We will be using the ELEX WooCommerce DHL Express / eCommerce / Paket Shipping Plugin with Print Label and ELEX WooCommerce DHL Express Bulk Label Printing Add-On. The Add-On requires the core plugin to be installed and activated for it to work.
Overview:
Shipping is an area that WooCommerce neophytes struggle with a lot. For one, the shipping settings available in WooCommerce are limited in that they don’t support assigning third-party shipping methods like DHL Express to Shipping Zones and Shipping Classes. Moreover, printing out shipping labels for placed orders one by one is simply not feasible.
Using ELEX Shipping Plugins you can seamlessly integrate DHL products and services into WooCommerce. DHL is one of the best shipping carriers in the world. Integrating their services has many benefits. For starters, being able to outsource shipping to industry experts with a decade of experience, and at affordable rates too. Moreover, WooCommerce DHL Shipping lets you enable Live Rates, Estimated Shipping Dates and Label Printing in bulk as well. You can even manage all of your returns efficiently from WooCommerce itself.
Prerequisites:
To enable bulk printing of DHL Shipping labels, you will need to first integrate WooCommerce DHL Shipping by installing and activating ELEX WooCommerce DHL Express / eCommerce / Paket Shipping Plugin with Print Label. We will also be needing the ELEX WooCommerce DHL Express Bulk Label Printing Add-On. This addon features seamless integration with the ELEX WooCommerce DHL Express / eCommerce / Paket Shipping Plugin with Print Label. Moreover, it is a complete and practical solution to handling bulk printing of WooCommerce DHL Shipping.
ELEX WooCommerce DHL Express / eCommerce / Paket Shipping Plugin with Print Label:
The ELEX WooCommerce DHL Express / eCommerce / Paket Shipping Plugin with Print Label helps to seamlessly integrate DHL Express, DHL Paket and DHL E-commerce shipping services and products into WooCommerce. Using this plugin you can:
- Access real-time rates from DHL Express, DHL Paket and DHL Ecommerce.
- Print shipping as well as return labels.
- Print Archive Air Waybill and Commercial invoice.
- Track shipments.
- Pack items into custom boxes.
- Offer discounts or add a markup on shipping rates, with Price adjustments.
- Ensure packages with insurance amount.
- Generate bulk shipments and much more!
What’s more, the three DHL Services can be separately configured. You can access the settings from your WordPress Dashboard > Plugins > Installed Plugins > ELEX DHL Shipping Plugin> DHL Express/DHL Paket/DHL Ecommerce.
1. Configuring Live Shipping Rates from DHL:
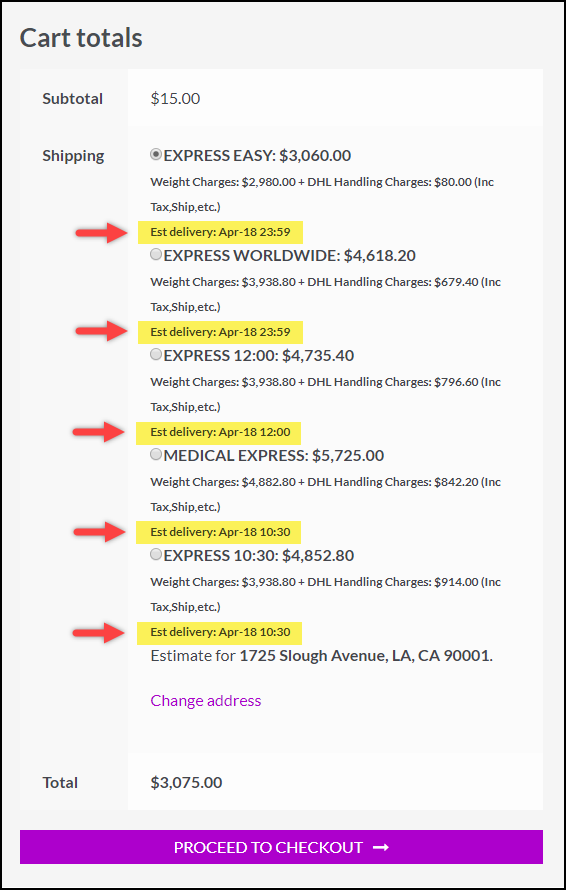
The plugin lets you choose to enable or disable the displaying of DHL Live Shipping rates on the cart page. Depending on the weight(automatically pulled from WooCommerce), the destination country and the sender country, the plugin sends an API request to DHL. The return live rates are then shown to the customer.
This lets the customer choose which service they want based on the shipping cost.
To enable Real Time shipping rates, tick the Enable Real-time Rates box under the Enable/Disable section under the General tab of the settings tab.
2. Enabling WooCommerce DHL Shipping Insurance:
DHL has an unrivaled network of customs brokerage offices across the globe. Moreover, its efficient brokerage, clearance and compliance service is geared toward making the customs process simple. DHL not only moves your goods seamlessly across international borders but also ensures complete security and provides insurance against unforeseen events.
What’s more, you can even select the countries that you wish to enable shipping insurance for.
Ticking the Enable Insurance checkbox will prompt you to select the Insurance Currency and the Conversion Rate. You can also choose to enable or disable the DHL Insurance Checkout Field.
3. Configuring Shipping Labels:
This plugin lets you enable or disable Shipping Labels. Using this feature you can generate Shipping Labels from the order Admin page. Disabling it will hide the label creation option.
What’s more, the plugin also comes with a slew of options to further customize shipping label generation. You can choose between 3 formats for the shipping labels: PDF Output, ZPL2 Output, and EPL2 Output.
The plugin also provides us with over 10 options for the printing size of shipping labels.
4. Setup Show/Hide DHL Services:
ELEX WooCommerce DHL Express / eCommerce / Paket Shipping Plugin with Print Label lets you choose to hide or show DHL services to customers.
The plugin lets us enable and configure estimated delivery times for each WooCommerce DHL shipping service available. You will have to choose the working days for your store in order for the delivery date calculation to work though.
You can also choose to enable or disable DHL account rates, display a break down of the charges or show only the Cheapest Rates to customers.
5. Configuring Shipping Services and Price Adjustments:
The plugin lets owners select and configures the shipping rates from DHL Express, DHL Paket, and DHL e-commerce as well.
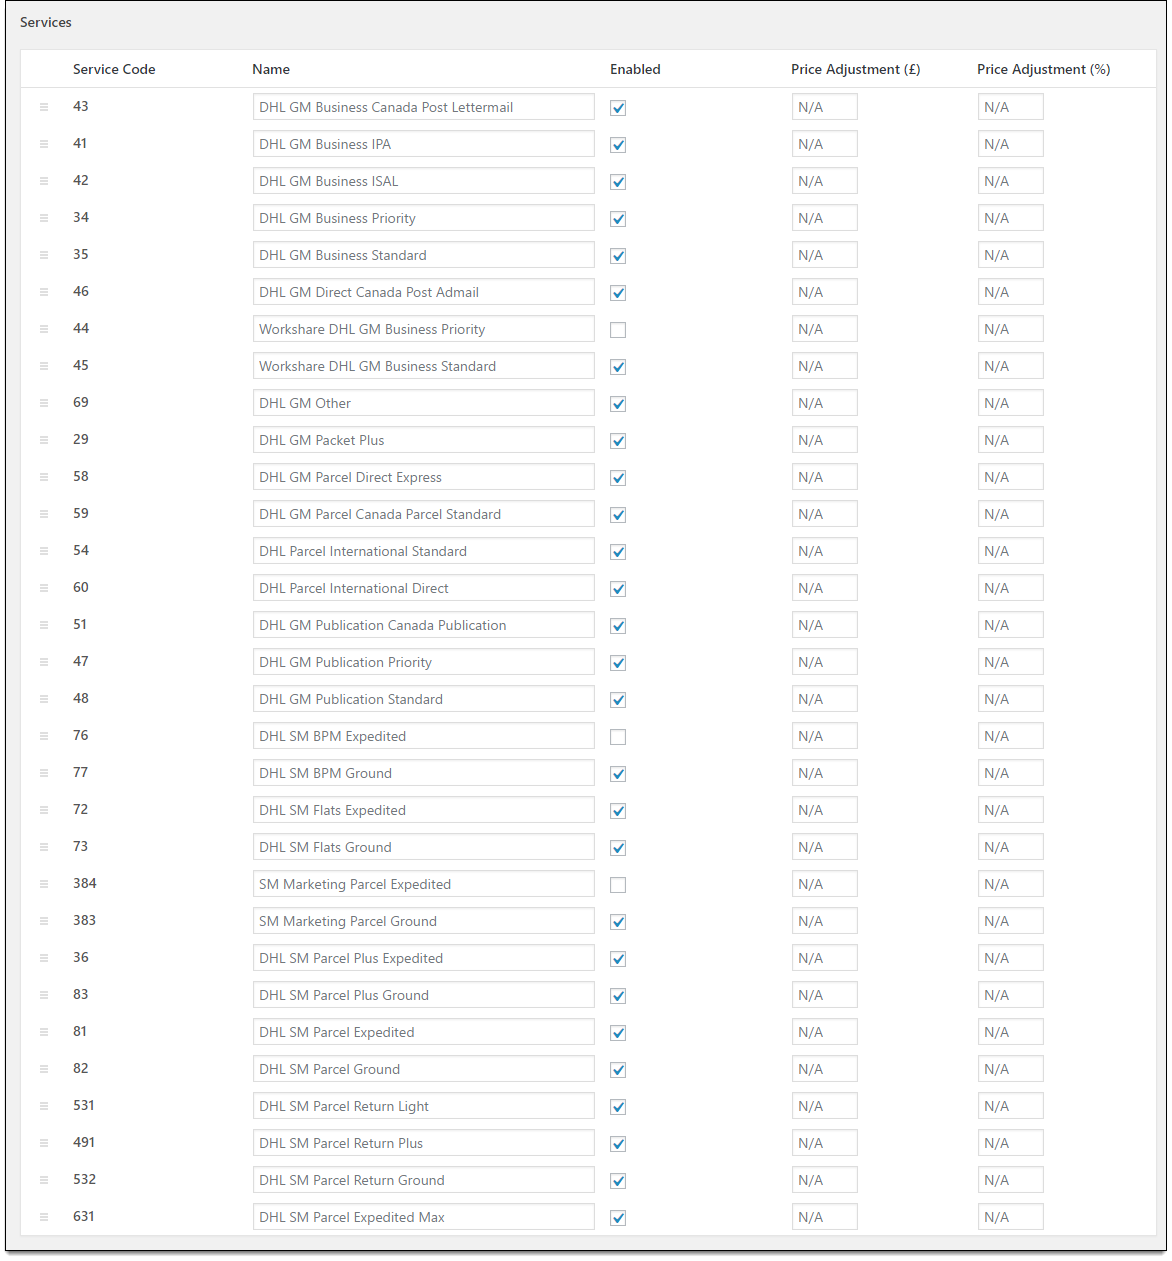
From DHL Express you can pick from over 20 shipping services to enable for your store. Additionally, you can easily also fully configure the price of the service as well. The plugin allows for either increasing or decreasing the rates by a flat amount or by a percentage.
This lets you account for surges in currency value, handling, and packaging costs as well as setup discounted prices for promotional sales. Moreover, shipping services from DHL E-commerce can be enabled and configured for WooCommerce in the same way.
6. Shipment Tracking:
Shipment tracking is an extremely nice feature to have if you’re an online retail store. Your customers can track their packages by themselves. The plugin integrates DHL shipment tracking into WooCommerce
The tracking number returned from DHL while generating the label would be added to order notes and will be sent as part of the order completion email. A visual representation of tracking status can be seen in Order edit page by Admin and in Order’s section of customer’s My-Account page. The tracking information shows the current status of the shipment in transit.
7. Configuring Parcel Packaging:
ELEX DHL plugin even lets you configure how your parcels are packaged. It comes with three options for this:
- Pack items individually: This is the default method. Packs every item in the order into its own box. Moreover, you can pick the type of DHL box used to package the item. Standard DHL Boxes, DHL flyers and an option for choosing our own box are available.
- Pack into boxes with weights and dimensions: This packages all items in an order based on the item weights and dimensions. You need to provide the dimensions of the box that include the outer and inner height, length and width. What’s more, you can give the max weight of the box and set the package type as well.
- Weight-based: Using this option you can set heavier items to packaged first, or lighter items to be packaged first or pack purely divided by weight. This requires the Maximum Packing weight of the box to be entered.
8. Scheduling Pickup Request:
The plugin allows you to place a parcel pickup request to DHL while creating shipments. You can specify the desired pickup day, time, and contact details. After successfully placing the pickup request, the store owner will get a unique booking number. This greatly simplifies the shipping process and is one of the major benefits of WooCommerce DHL shipping.
The DHL personnel will visit your store location, help you with the packaging if it’s needed and will ship it. Of course, WooCommerce stores that ship in large volume stand to benefit the most.
Setting up Bulk Printing of WooCommerce DHL Labels:
Using the addon you can simplify the process of shipping labels generation in bulk. The plugin uses the iLovePDF API to generate consolidated PDFs that contain multiple shipping labels. You can choose the orders you wish to be included in the consolidated PDF, by selecting the order IDs. Once installed and activated, you can find the addon settings under WooCommerce > DHL Express Bulk Print Labels.
Set the Select Method to By Order IDs. This will prompt you to select the order IDs that you wish to be included in the consolidated PDF individually. The addon automatically pulls all of the existing orders you have in WooCommerce irrespective of the status of the order. You can choose however many orders you wish to include in the consolidated PDF. Clicking on submit will prompt the add on to create shipments and generate DHL labels automatically. For orders that already have the labels generated, the add-on includes them in the consolidated PDF.
Or you can also generate a consolidated Shipping label PDF for a date range that you can set. Setting the Select Method to By Date Range will prompt you to select a From and To date. Clicking on Submit will signal the add on to pull all the orders placed in that specific date range. It will then create labels for the orders that don’t have them generated yet and for the ones that have them already, copies them over into the consolidated PDF.
A consolidated PDF containing multiple WooCommerce DHL shipping labels looks something like this:
Conclusion:
We have gone over the advantages of integrating DHL Shipping into WooCommerce and how you can do this using the Stamps.com plugin. The free version of this plugin supports
- Access real-time rates from DHL carrier.
- prioritize Flat rates over Package rates.
- Setting custom method titles for DHL shipping methods.
- Option to customize each service name.
- fallback rates to process shipments when DHL fails to return any shipping rate.
The premium version lets you enable shipping insurance, tracking, parcel packaging algorithms and more. You can find more information about this plugin here.
Further Reading:


